Ringing in the new decade with a new kitchen!!! After months of tireless work transforming this space, I’m thrilled to share the results!
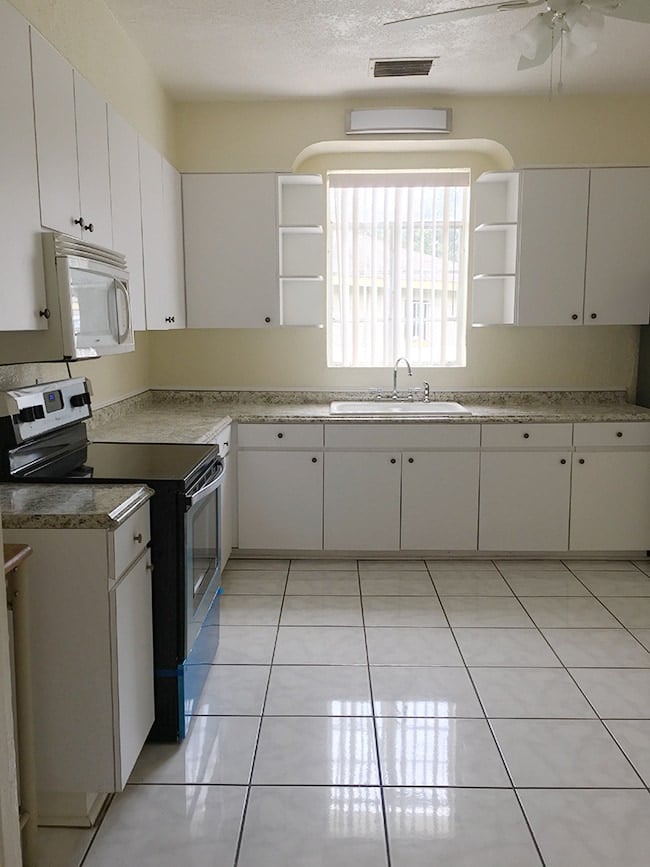
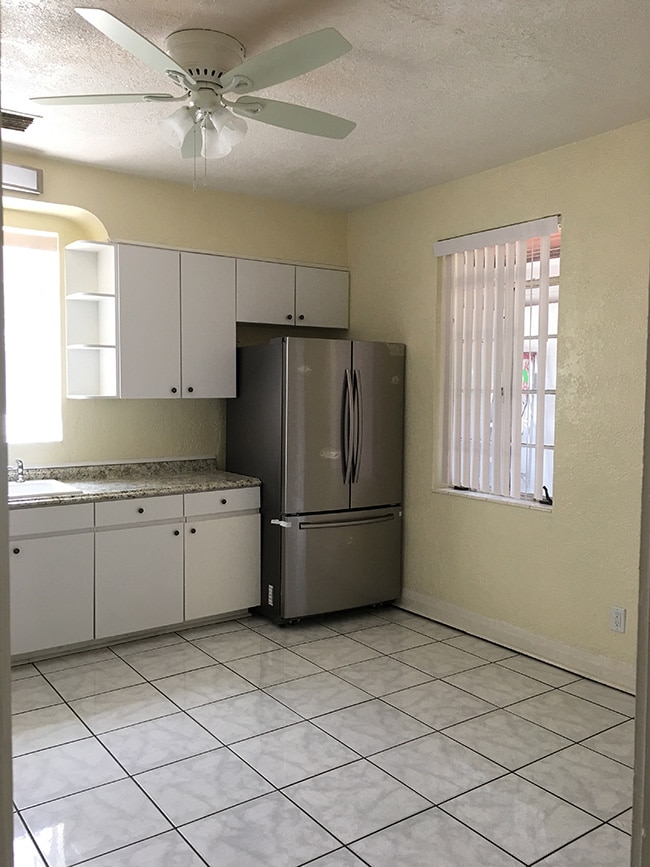
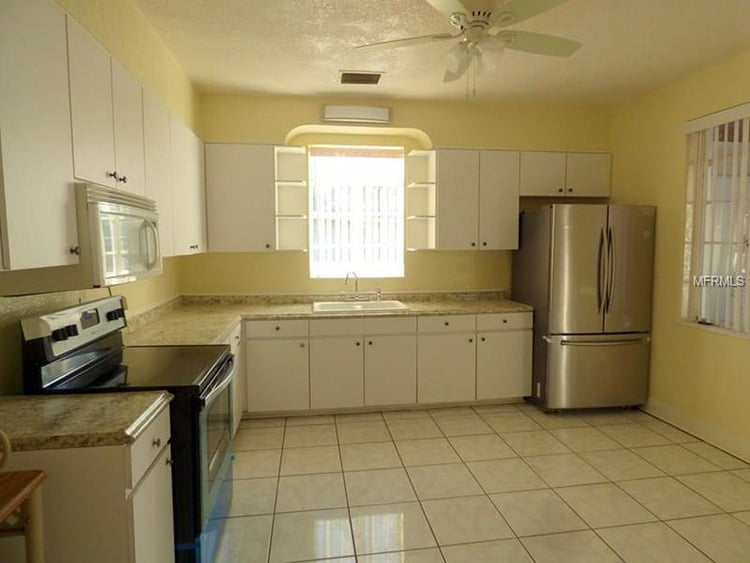
If you’re just joining the party, make sure to get caught up on the whole process with Part 1, Part 2, Part 3 and Part 4. Here’s how the kitchen looked before:
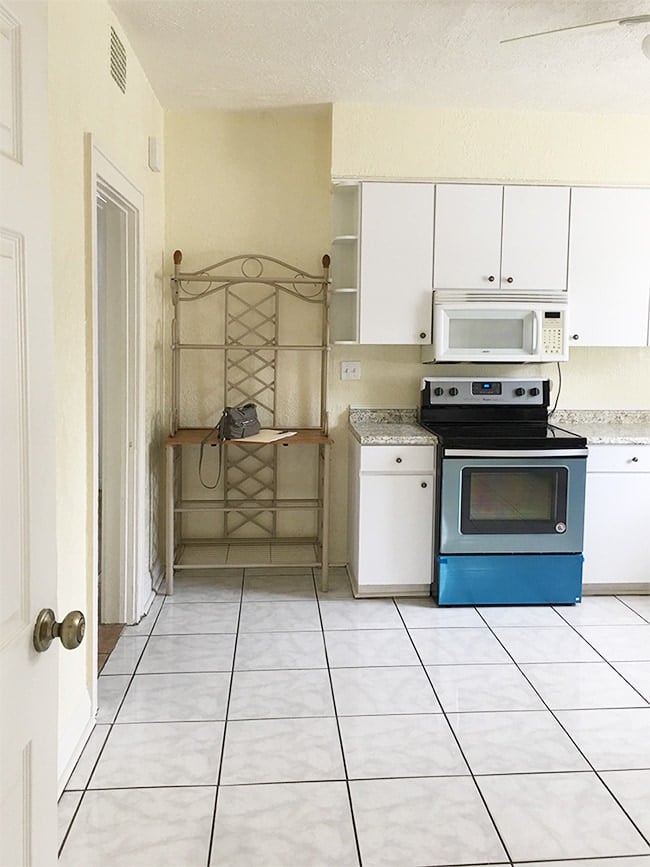
It’s your standard 13×13′ room, L shaped layout.
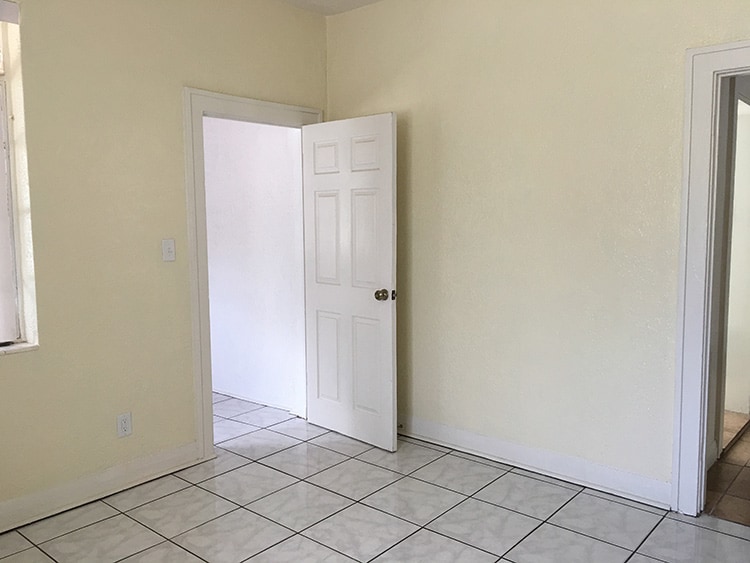
There’s a doorway leading from the dining room and another to the laundry room.
With the floor plan of the house, we didn’t have the option to change or increase the footprint (including widening the main doorway, which borders a bedroom).
But even if we did, the goal was to transform this room on a budget—this house will be a vacation rental and as an investment property, we need to minimize our costs.
For this makeover, that meant choosing inexpensive finishes and lots of DIY! We first replaced the old tile with durable Pergo laminate back in 2018 (currently on sale for only $2.48/sf right now, I highly recommend these for wear/durability!):
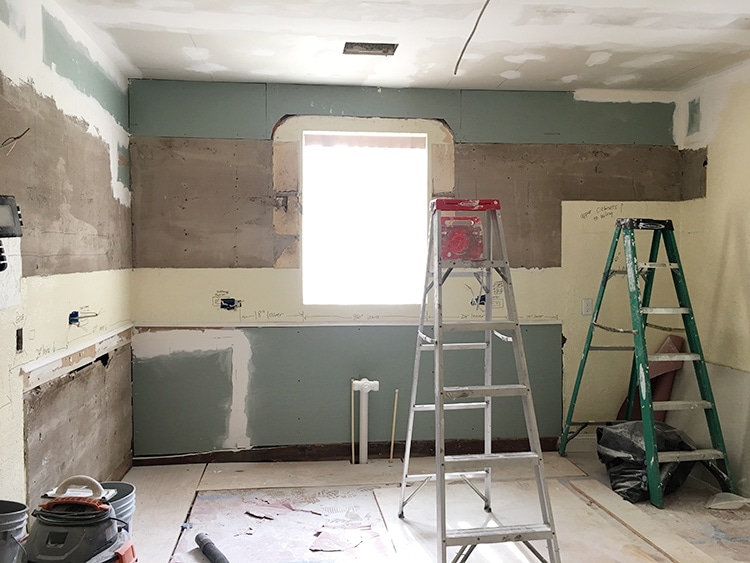
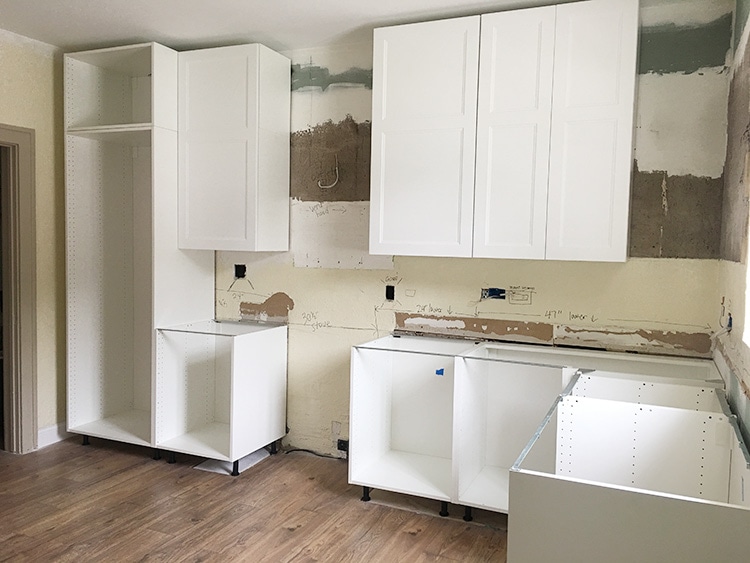
Over the last summer, we gutted the kitchen, redid some of the rotted joists, ran new plumbing and electric.
We also repaired the walls and added smooth drywall to the uneven ceiling.
We waited for Ikea’s kitchen sale and purchased all of the cabinets, built-in dishwasher and countertops for around $5800 (more details on that in this post).
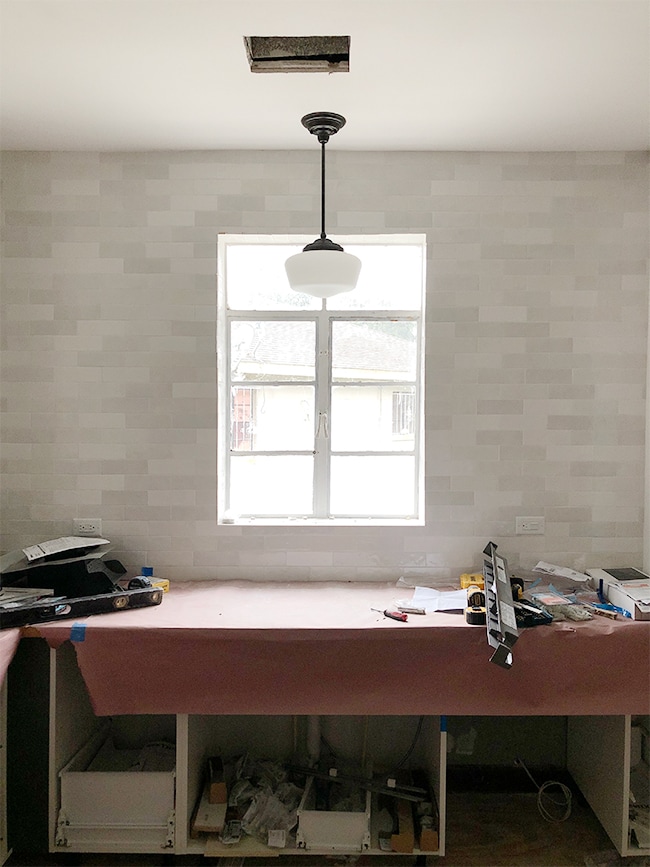
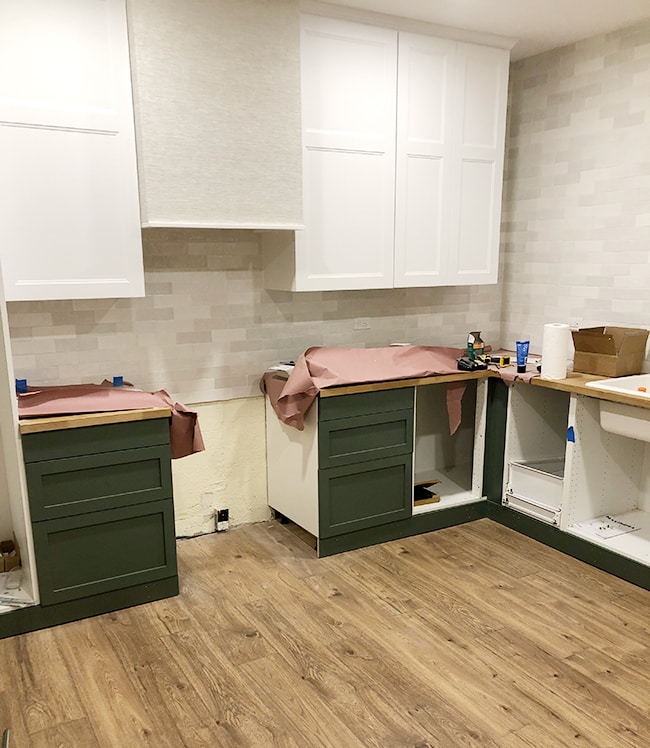
The backsplash tile was installed (we hired this part out to save time) …
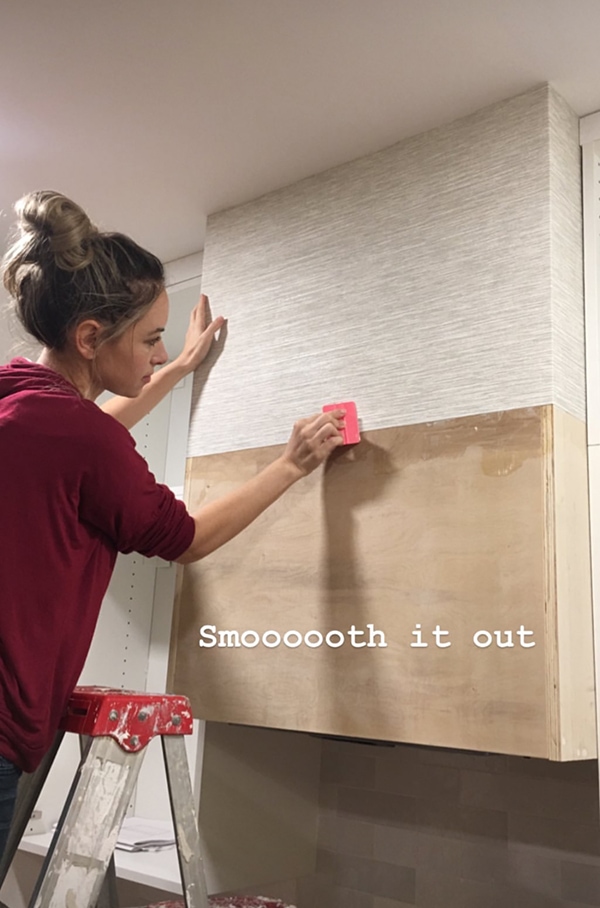
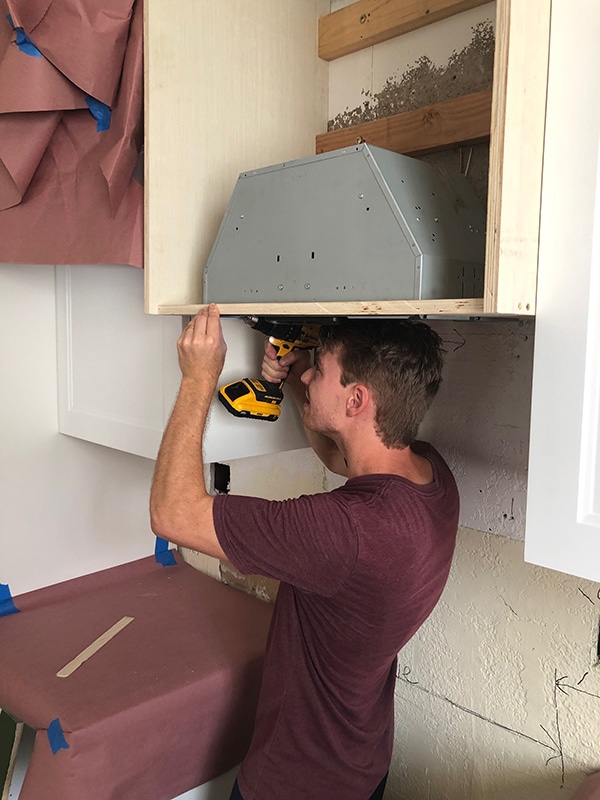
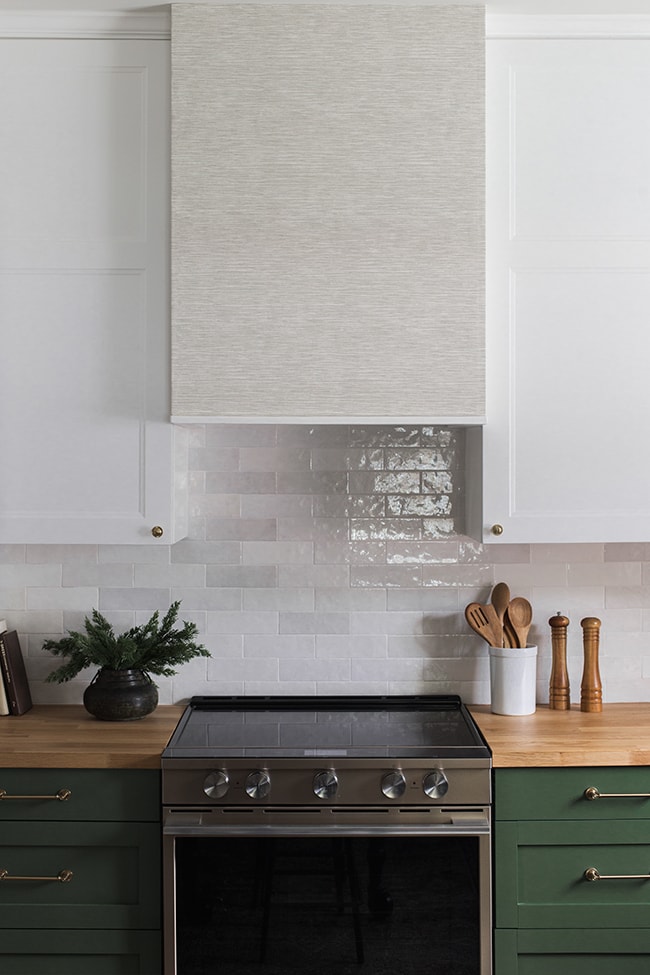
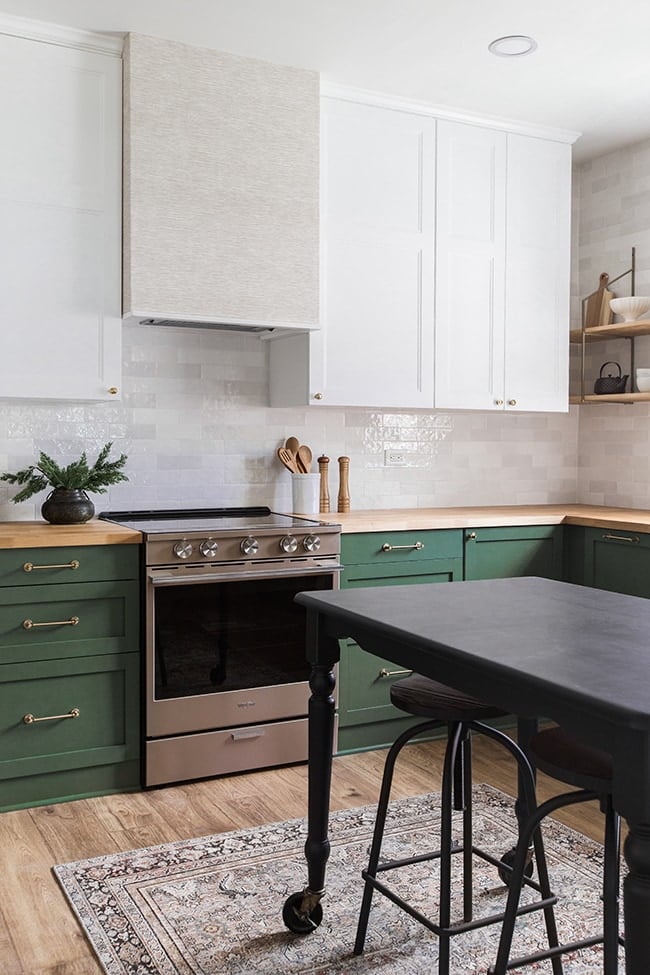
And then Lucas took over and spent his nights and weekends finishing the rest. So much custom work went into this, like building a custom range hood (which we finished with wallpaper!)…
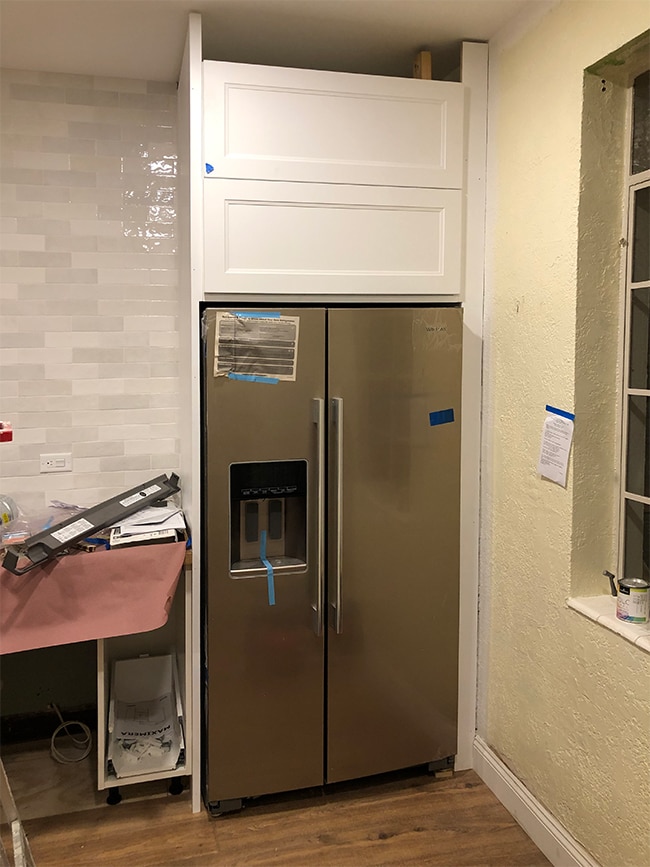
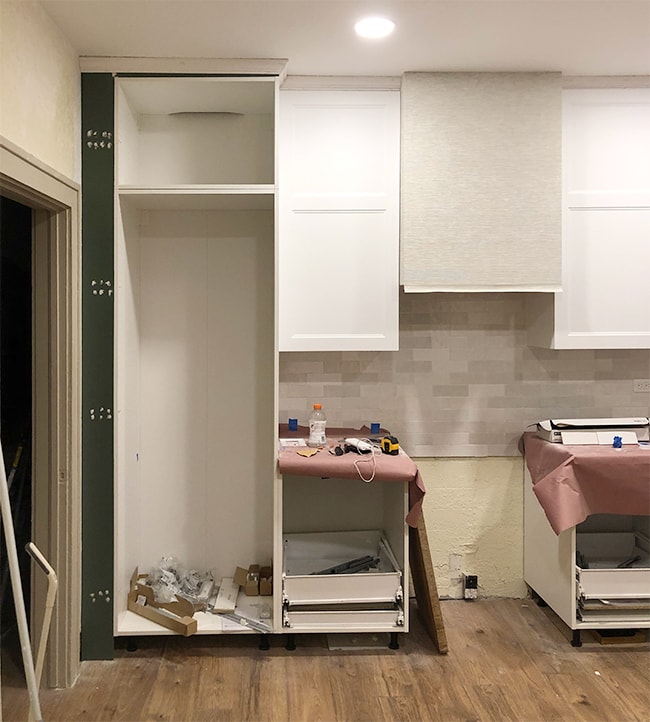
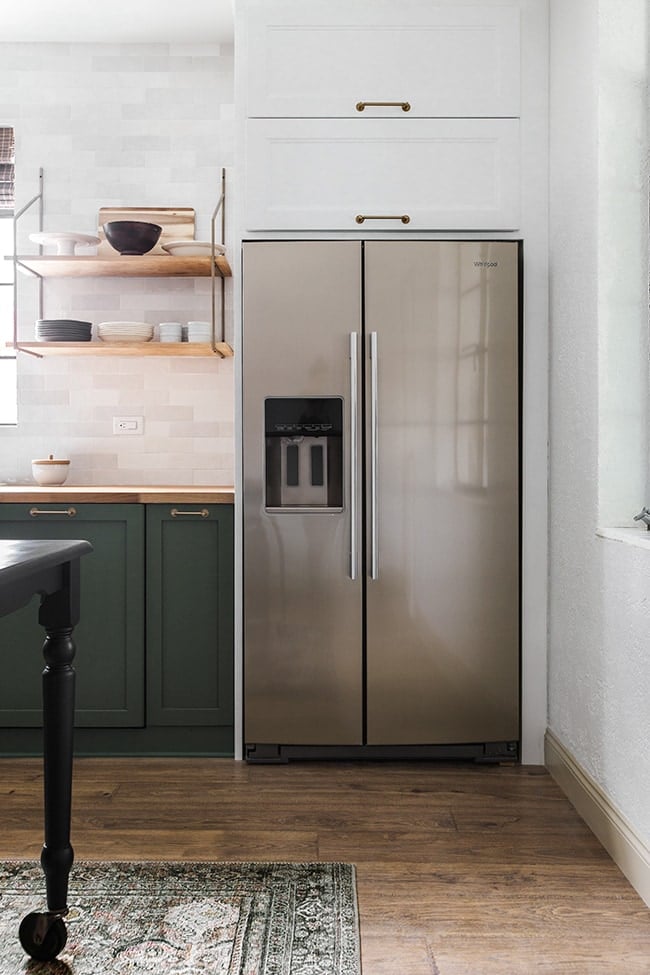
Custom wood panels around the fridge…
And around the pantry cabinet…
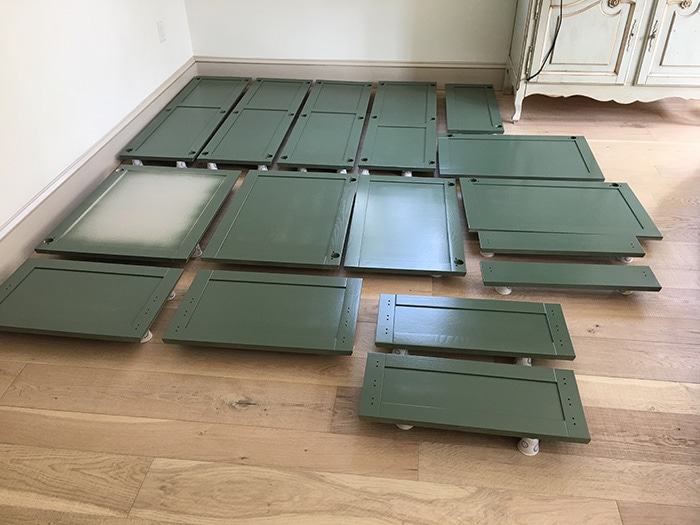
And of course, the weeks-long process of painting the lower wood cabinets (our first time using a paint gun):
And all of the custom fit trim and baseboard around the lower cabinets…
It was truly a learning experience for Lucas, who did 95% of the work (I wish I could have helped more, but someone’s gotta watch the baby!) It was his first time figuring out most of this and I’m so proud of his work ethic and determination to complete this project.
In the end, it took significantly longer than we had expected/hoped but going into the new year we have a brand new custom kitchen that I think anyone would be happy with!
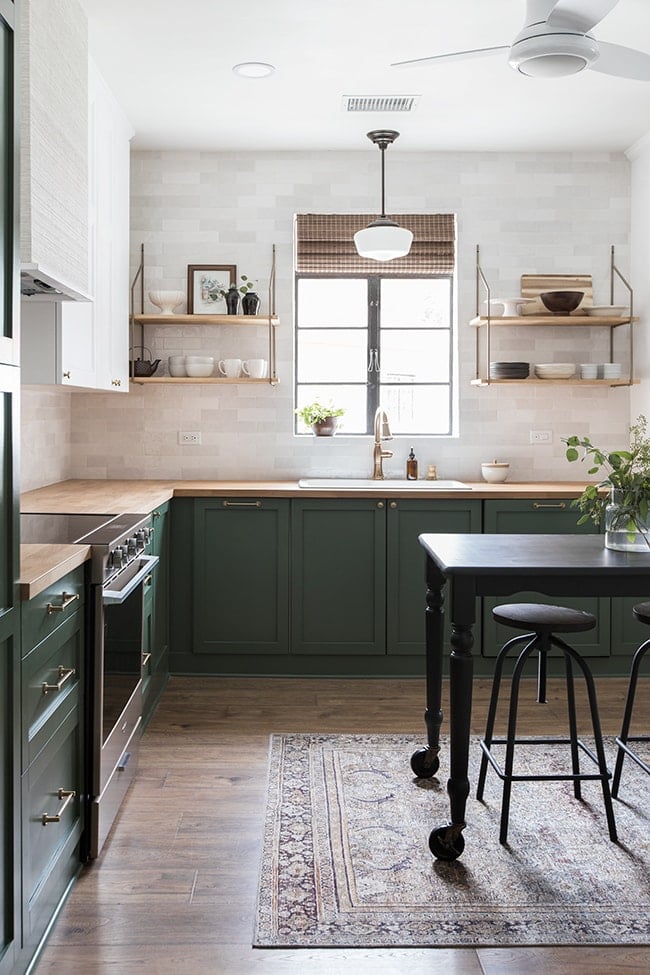
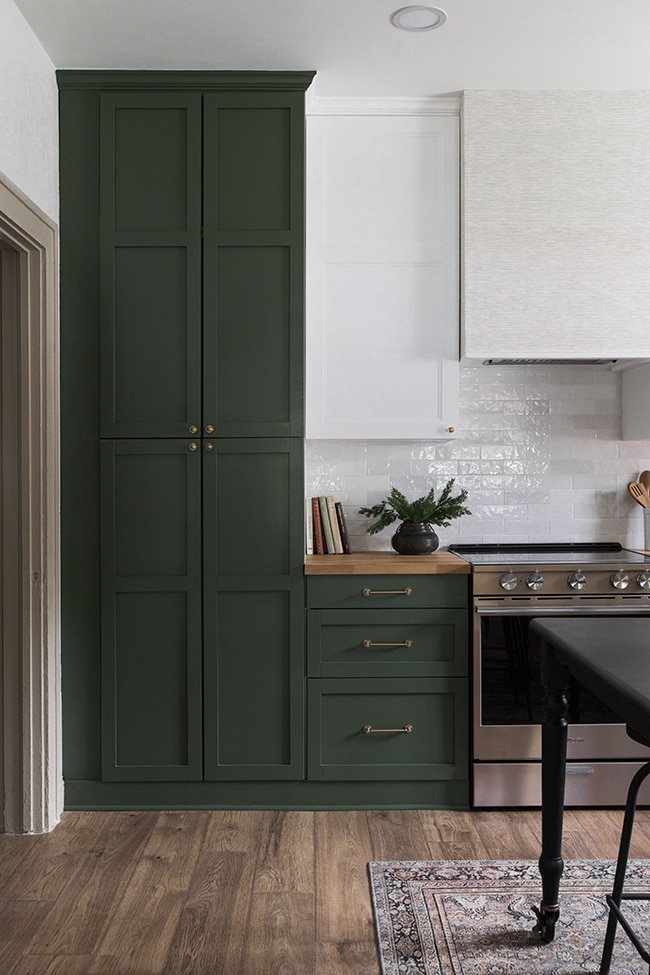
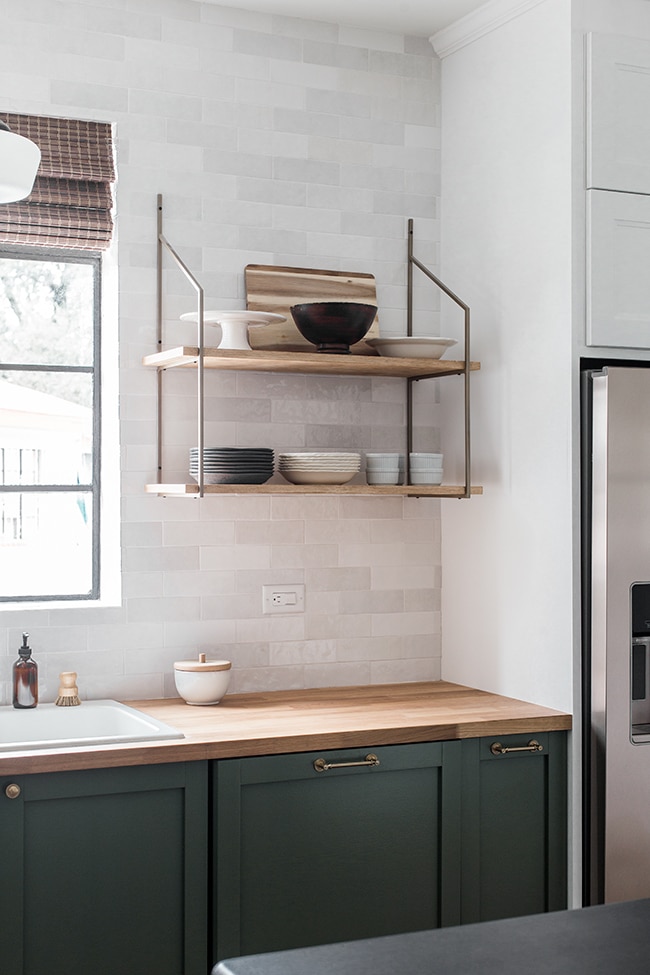
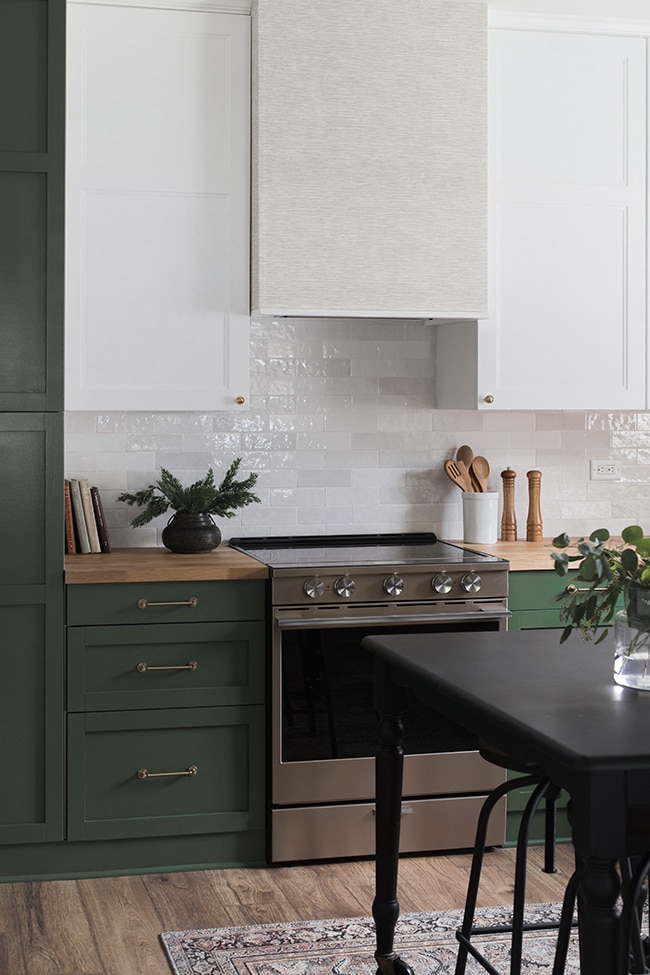
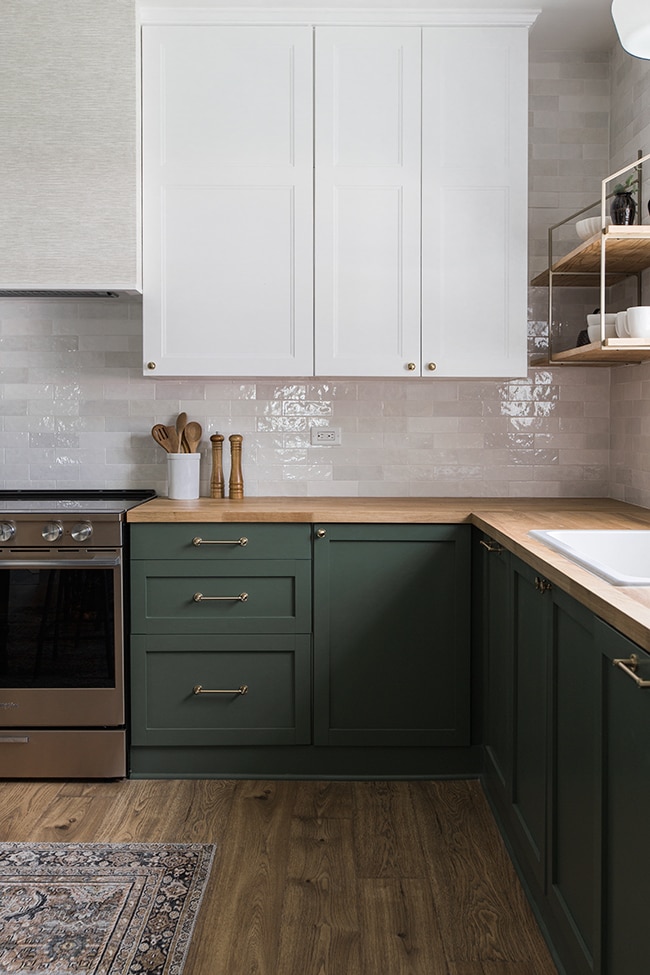
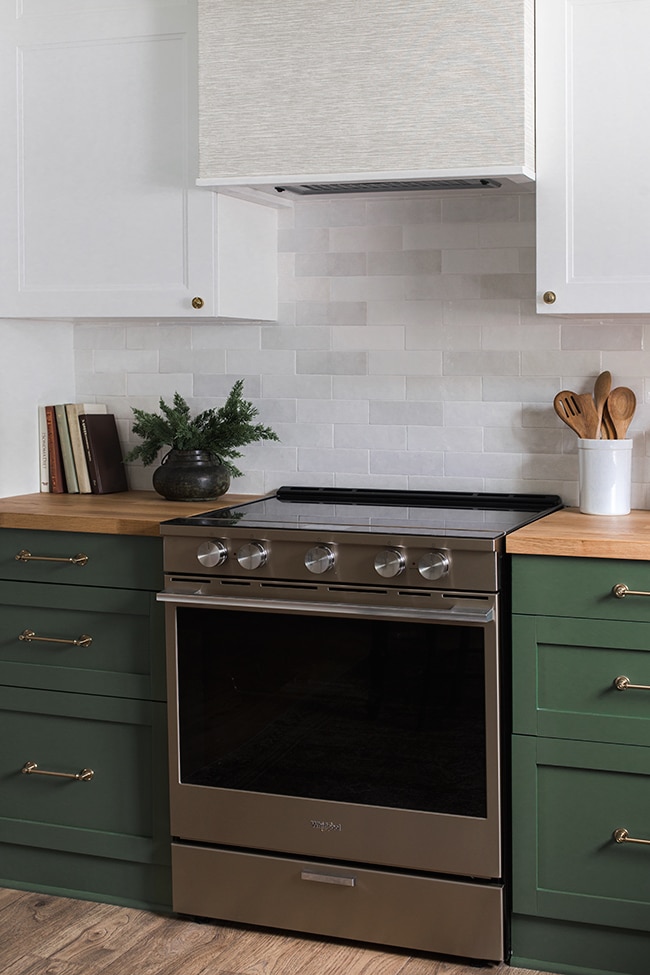
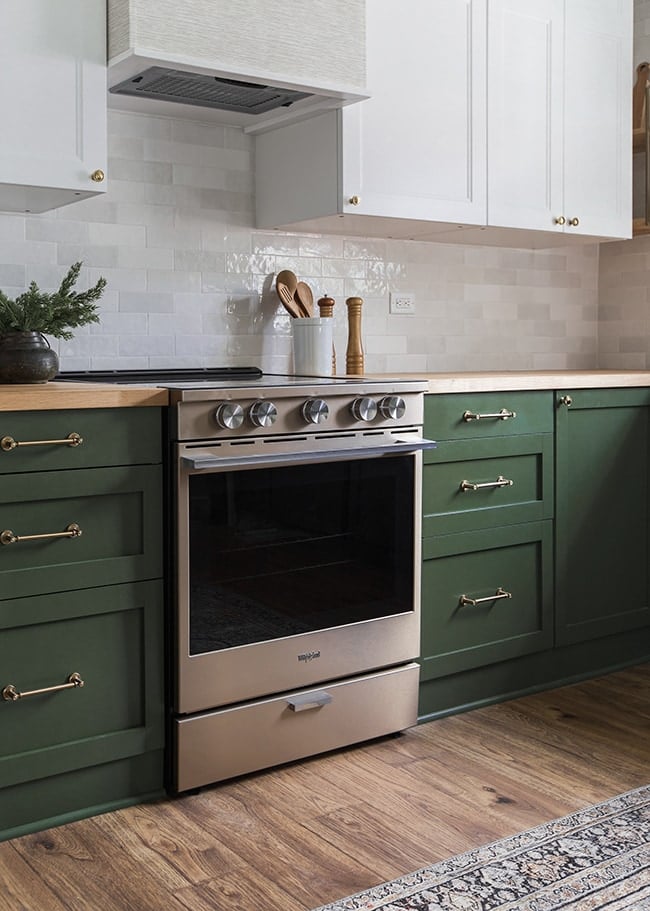
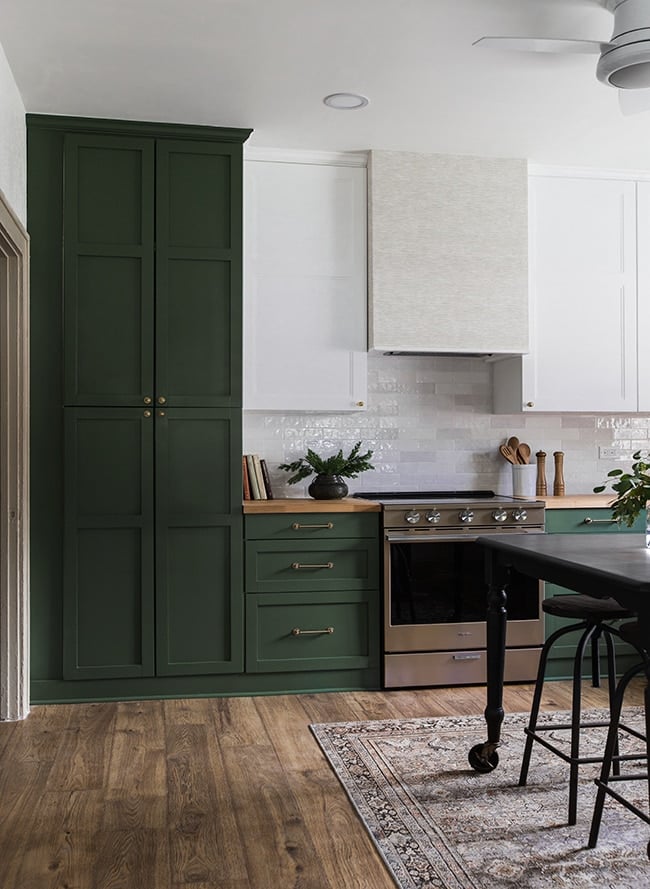
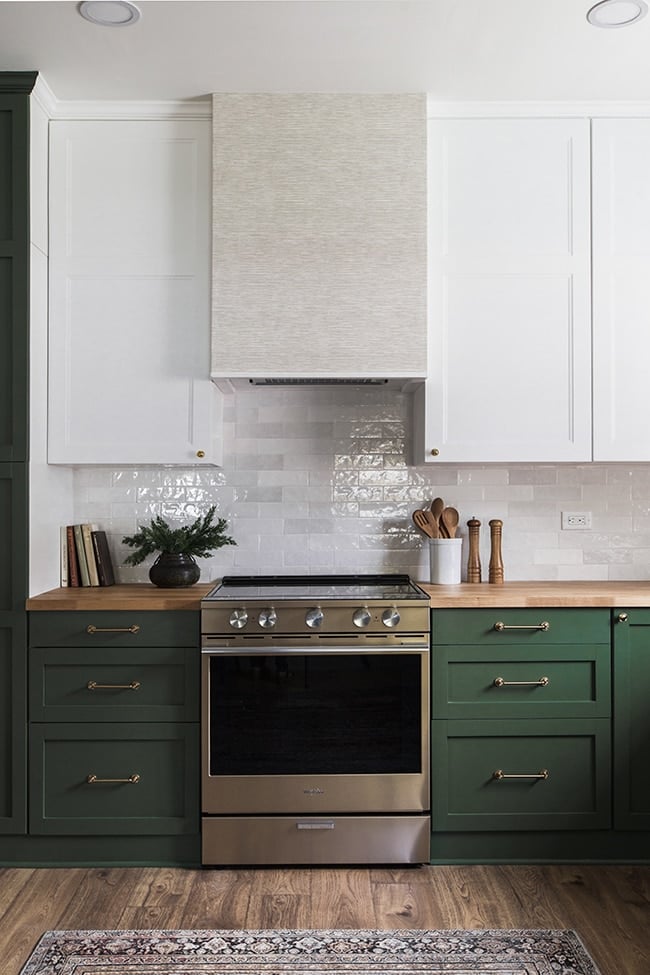
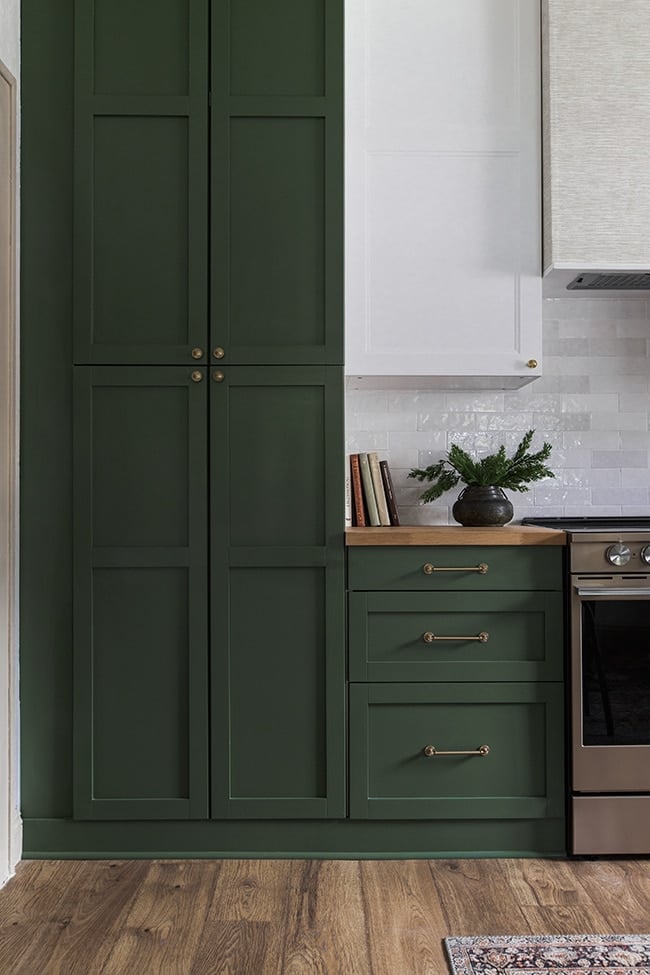
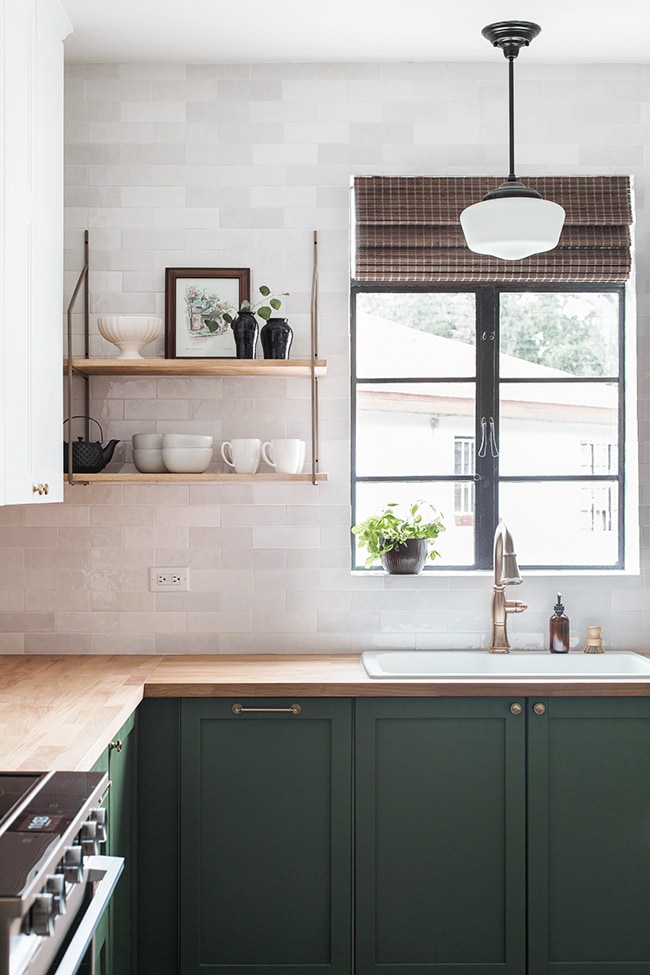
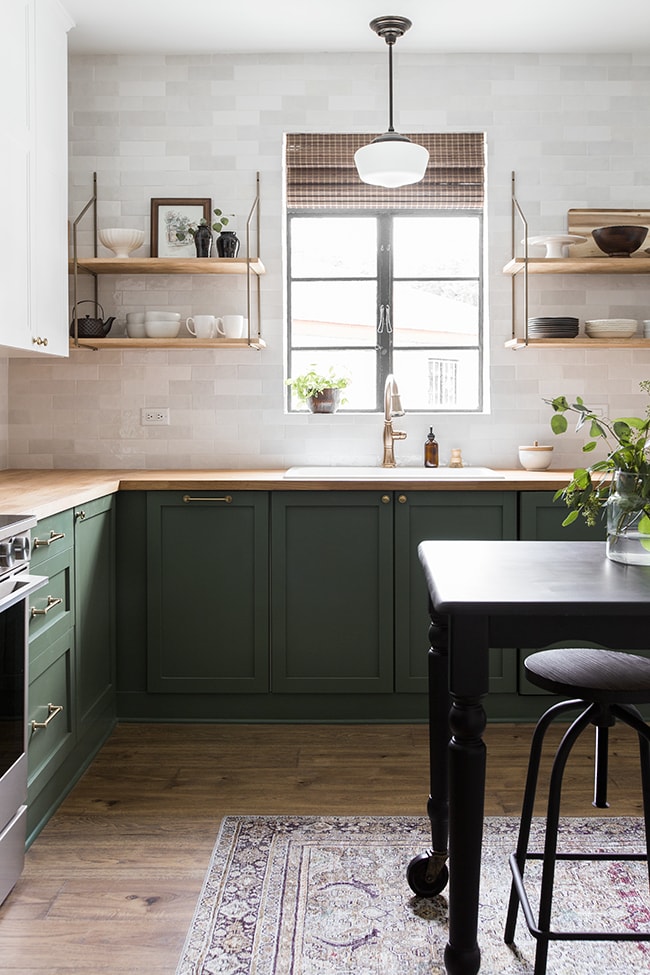
The star of this show is arguably those rich green cabinets.
I’m digging the BM Peale Green.
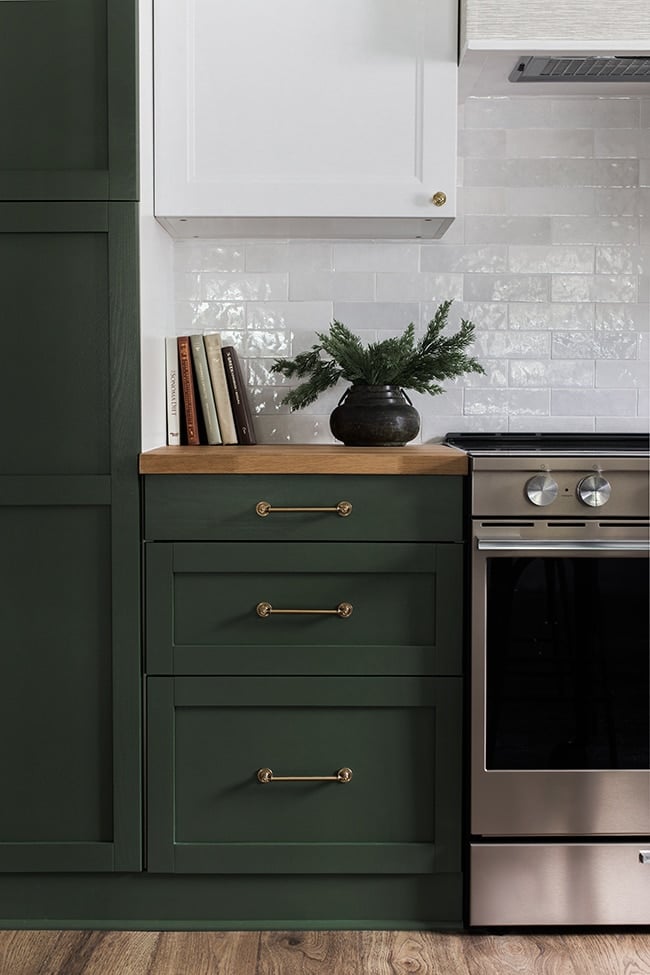
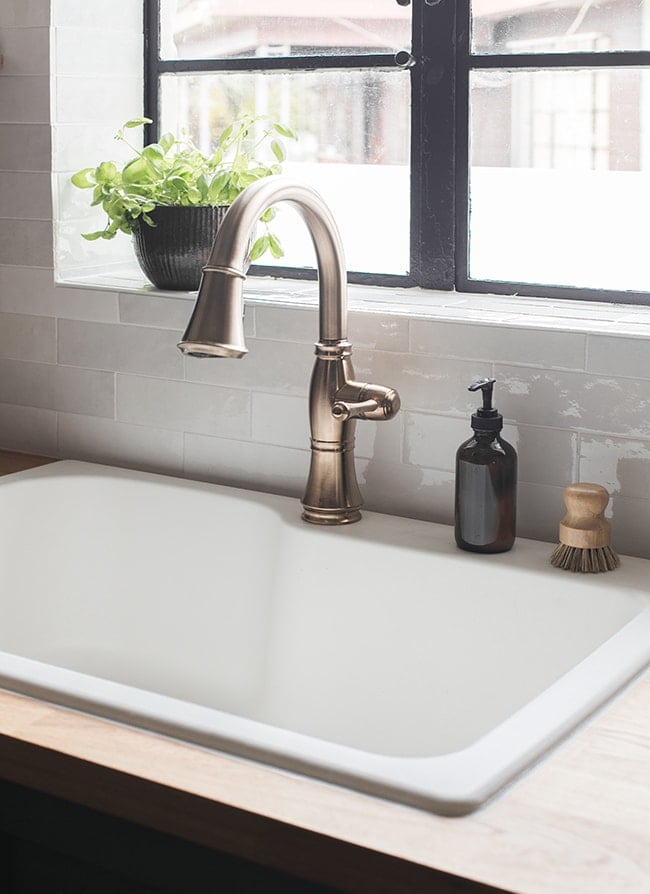
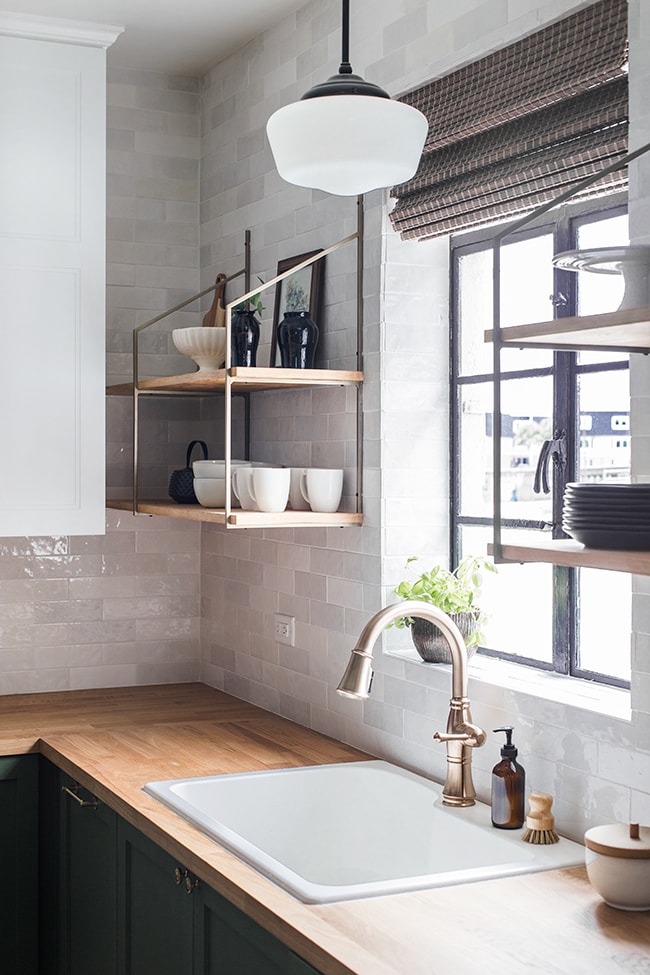
The warm gold finishes are a really nice compliment and I’m happy with the way they turned out. I used inexpensive pulls and knobs I had been eyeing on Lowe’s for a long time, and the finish is close to Delta’s champagne bronze faucets (a personal favorite).
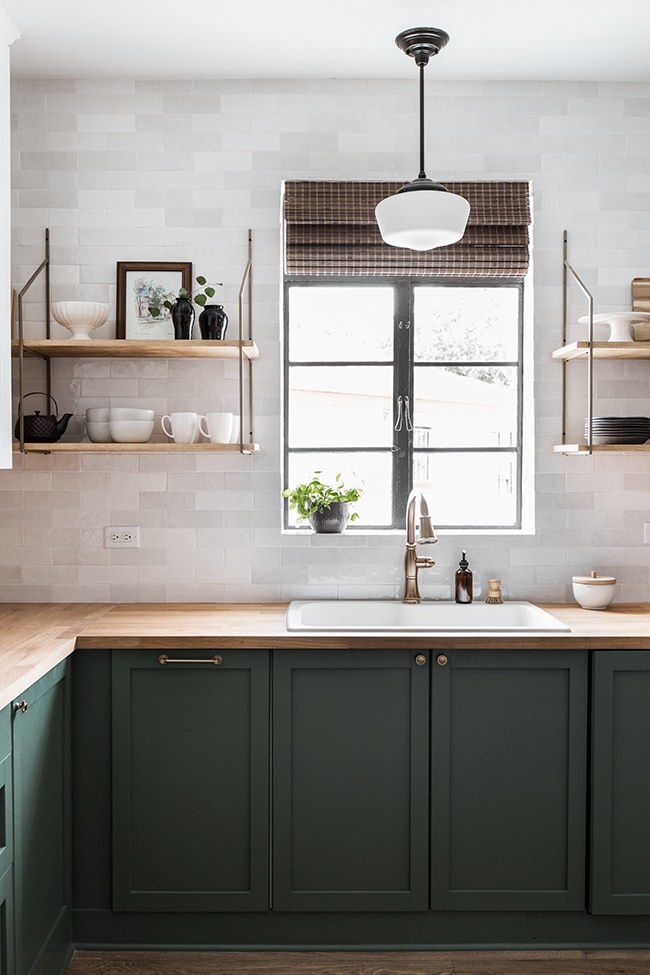
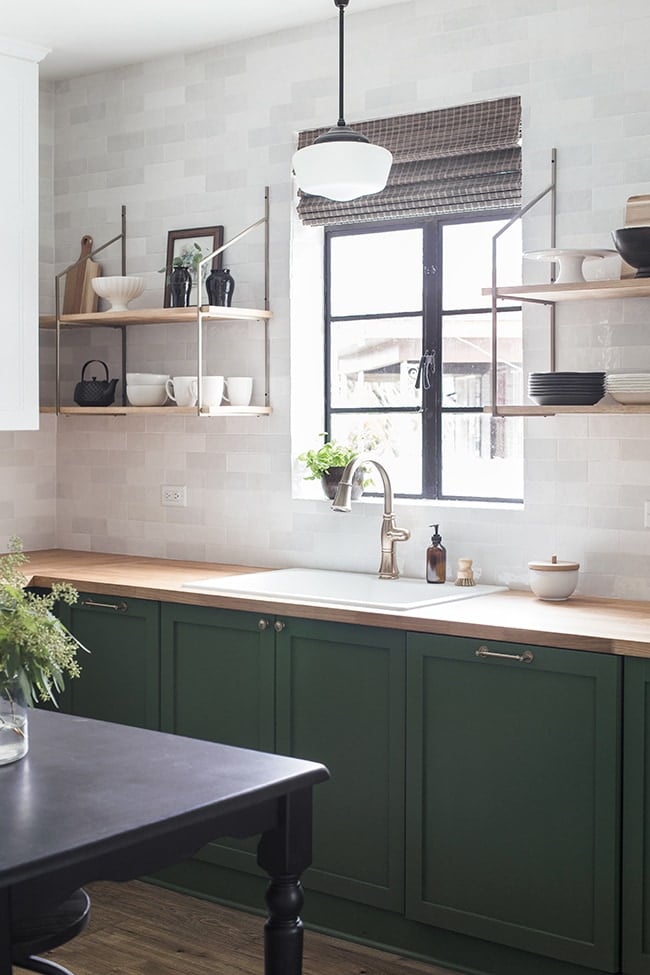
I went with an affordable drop in sink for easy installation, and because the counters are not solid butcher block so we didn’t want the cut to be visible.
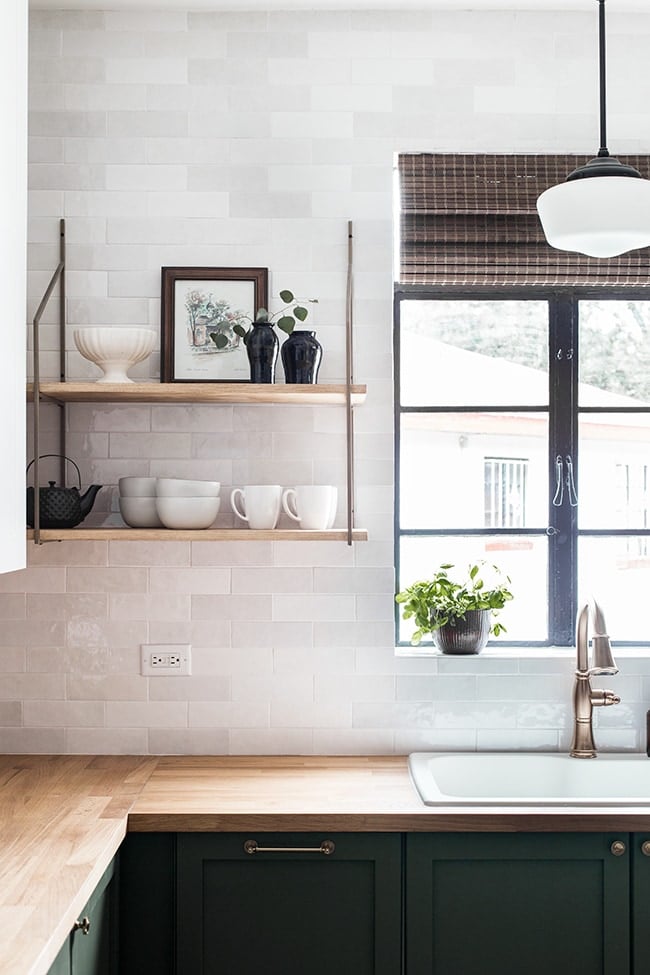
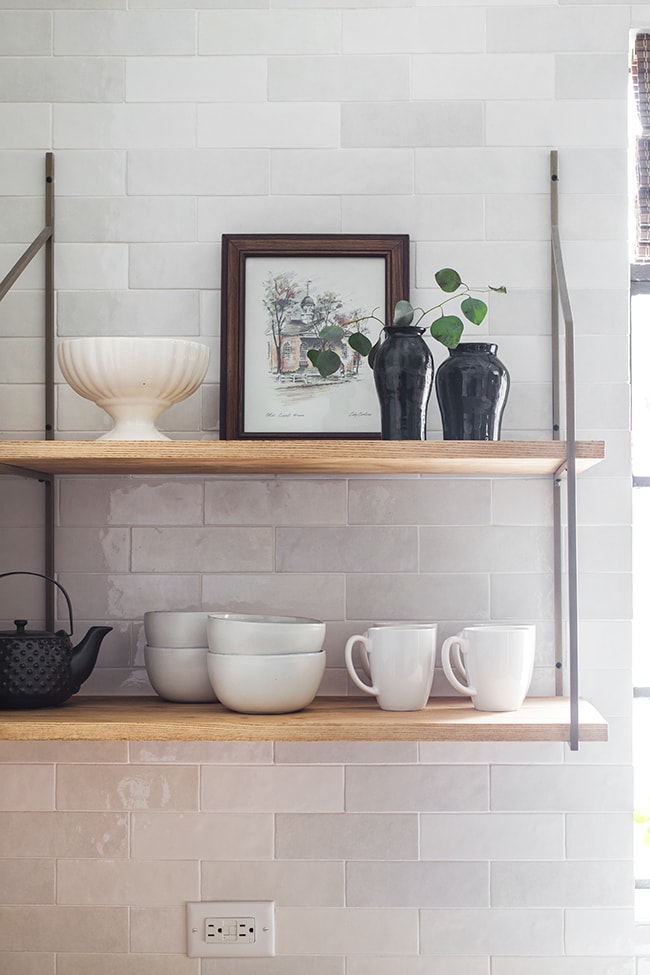
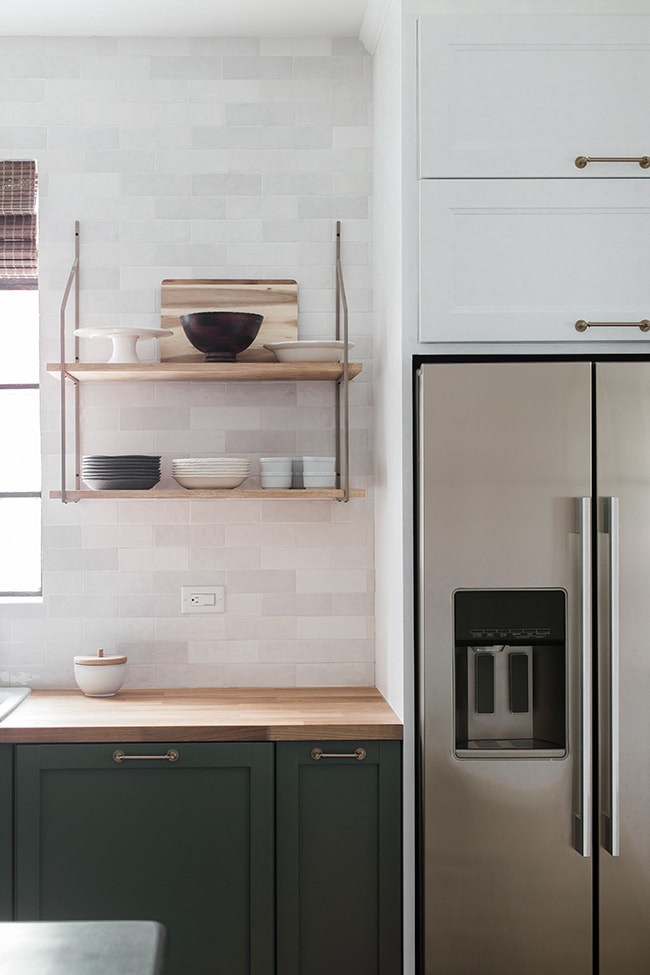
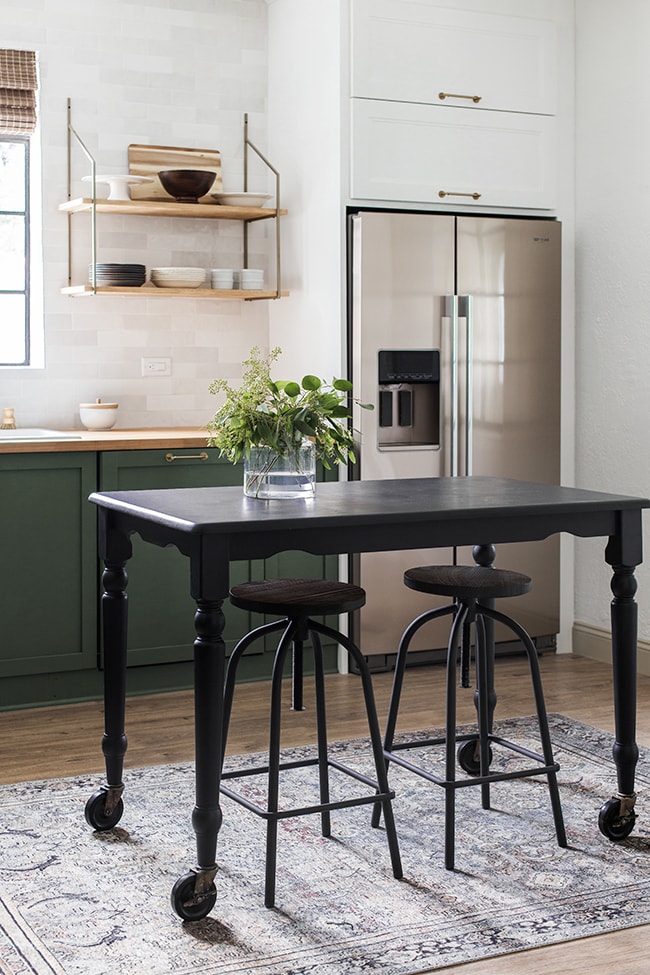
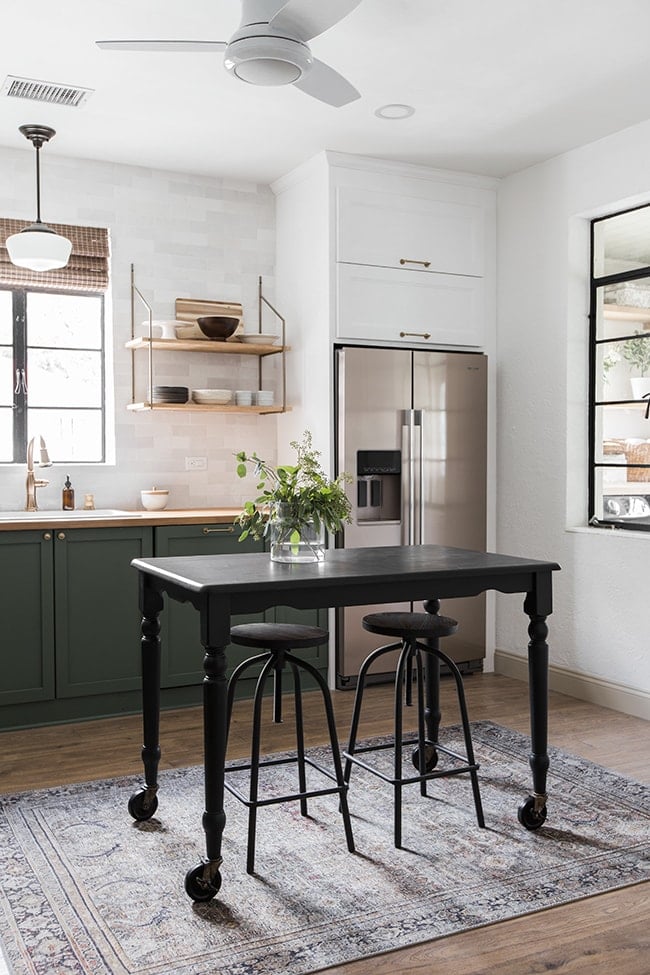
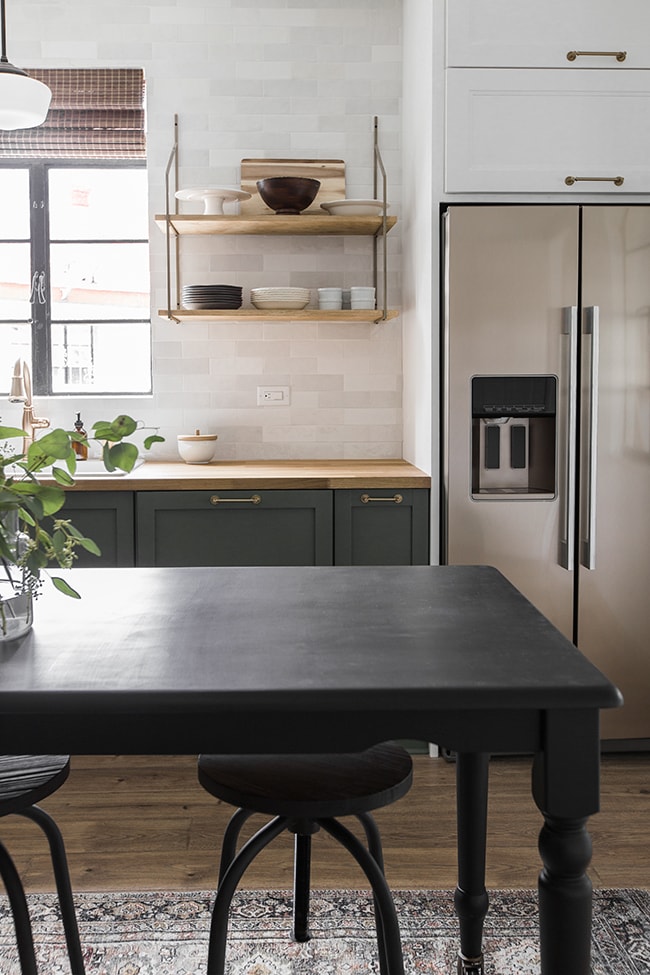
How neat are these shelves? I knew I wanted open shelving but thought it’d be fun to try something different than the typical floating shelves. I partnered with Shelfology to customize this Verne shelf system to perfectly fit our space.
You can get them in any size with any type of wood (I ordered the 12″d unfinished Ash and we stained them to match our countertops). They’re installed using 3 screws & anchors in each bracket—much easier than our experiences installing floating shelves!
My favorite part is that you can make the brackets any color you want. They offer custom powder coating in hundreds of colors, so I was able to choose a metallic gold that matched our faucet. Can you tell how much I love these shelves? 🙂
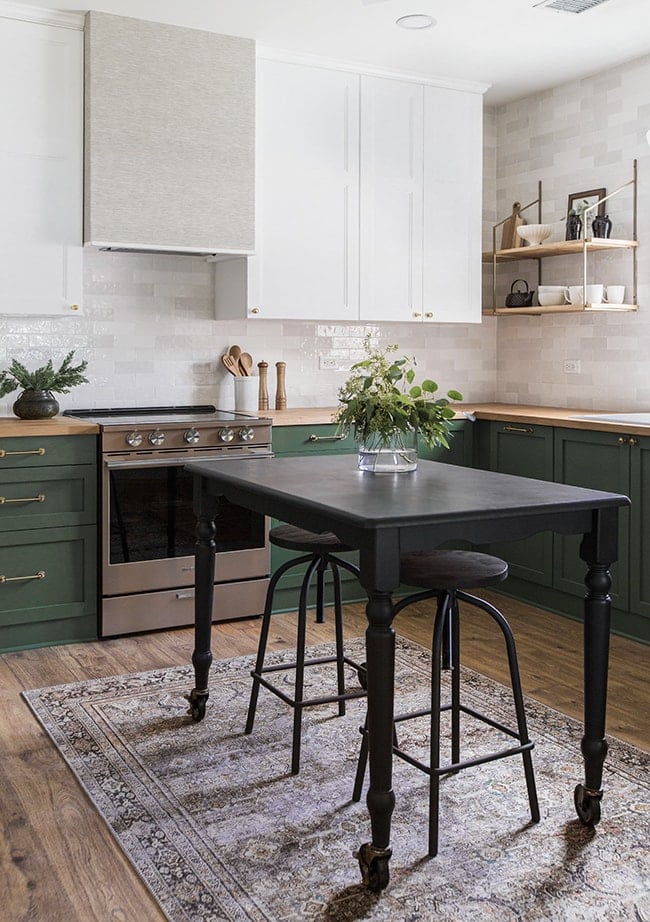
And can we take a moment of appreciation for this Cloe tile? I knew it would be lovely (we installed it in baby blue in the Blue Lagoon Bathroom) but man, it’s pretty in white too.
It adds such a nice iridescent texture to the room.
Speaking of shiny things… did you notice the appliances?! I was nervous about ordering these without seeing them in person (and very little photos of them ‘in the wild’ online) but I have to say, I’m a big fan of the Whirlpool Sunset Bronze…
We ordered the counter-depth fridge (10% off right now!) with the ice/water dispenser—very convenient for a rental! The inside is still covered in plastic but so far, so good 🙂
The matching stove is my favorite, though. It’s a touch screen with smart technology and the most high tech appliance I’ve ever owned.
We’ll be able to connect it to our smart app and monitor/control it via phone if needed, which could come in handy later on.
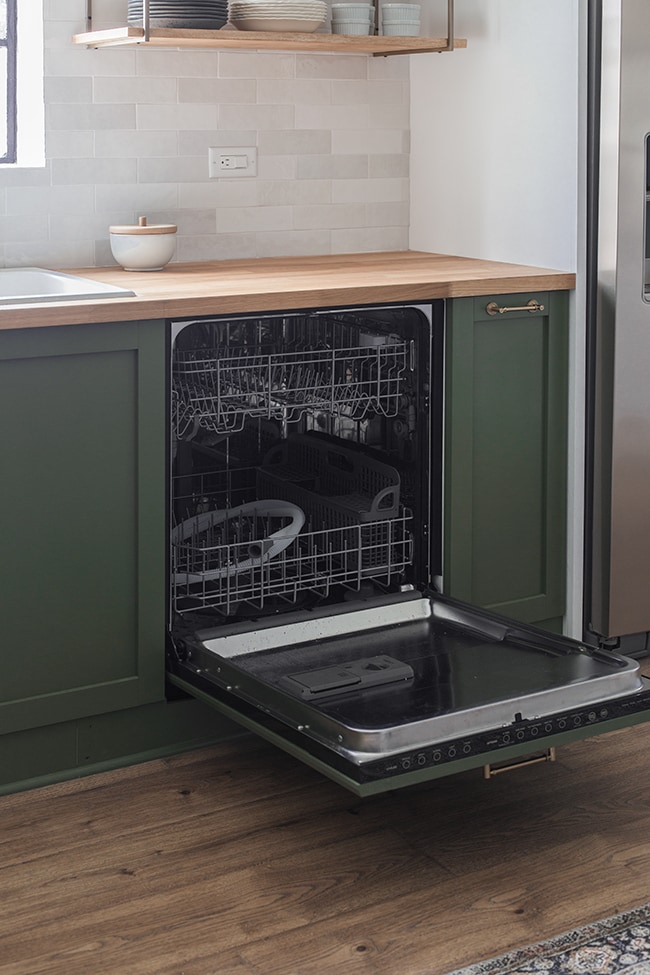
As for the dishwasher, we opted for the Ikea Spolad to fit with the Torhamn door for a built-in look. Haven’t ran a cycle yet so I can’t speak on the quality, but we don’t love the fact that it isn’t flush with the rest of the doors. Live and learn…
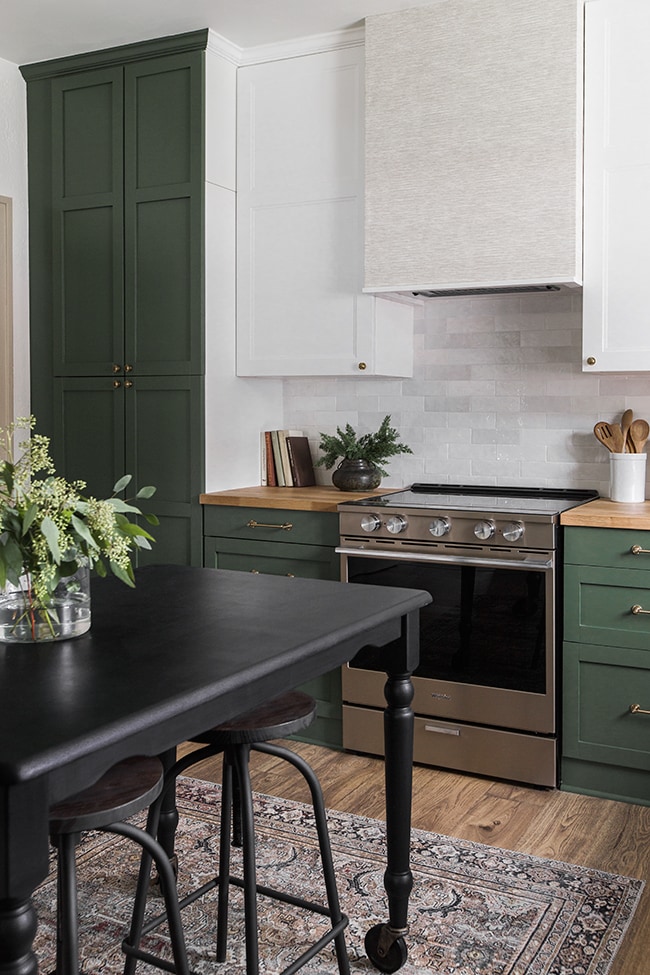
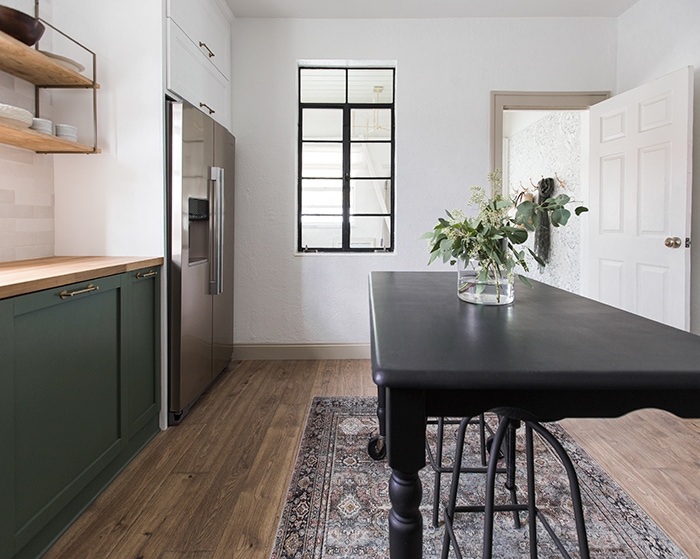
The “island” is a $50 table I refinished (Maison Blanche’s Wrought Iron) and put on 4″ casters.
There isn’t a lot of counter space in this kitchen so this is an easy fix for that, and the bar stools provide the added bonus of seating.
You barely notice the low profile ceiling fan, but it was a necessity in this room that can quickly turn into a greenhouse with west facing single pane windows and heat from the oven and stovetop.
Does the rug look familiar to you? It’s the same rug we have in our living room (my favorite rug of all time)! I loved it so much I had to get one for this house. It looks brownish in photos but in person it has a lot of deep green in it—a perfect match for our cabinets.
Using a grasscloth wallpaper treatment on our range hood was an experiment (I’ve never seen it done before) but I’m glad we took the risk, I think it turned out to be a pretty unique feature (and so simple!)
Side note: I haven’t finished stocking the kitchen with vacation rental supplies yet, so some of these photo props were borrowed from our house and won’t be staying permanently 😉
The tall cabinet on the left will hold the microwave + broom storage. We still need to customize the shelves to make that happen…
Since no one is living here full time and we only need the basic necessities, there’s an abundance of storage space!
Painting the metal windows black was a quick and easy way to make them pop.
And you can never go wrong with a classic schoolhouse pendant light and inexpensive woven shade.
We can just imagine all the families that will soon get to enjoy this kitchen and make memories here!
A lot of love and time went into every detail, and we hope it shows.
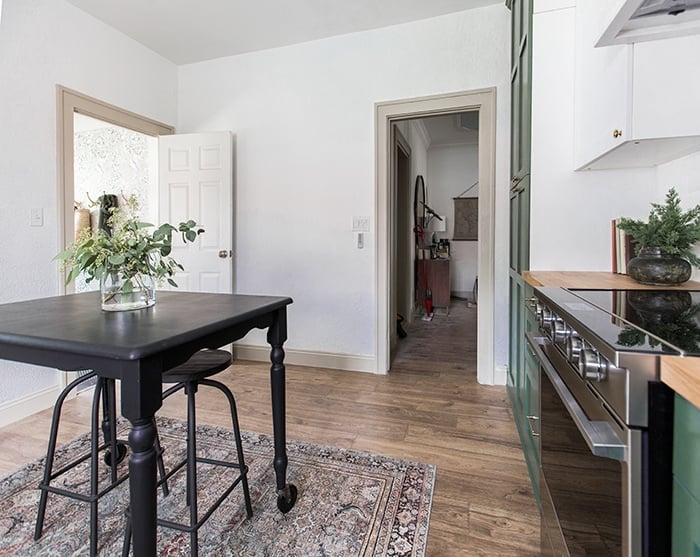
The kitchen isn’t 100% finished though, we still have to swap out the laundry room door and build a large chalkboard for the back wall (between the two doorways).
The other side of the room is clearly not as exciting…
Ahh, this view is better…
Sources
Wall color: SW Pure White
Trim color: SW Loggia
Cabinets: Ikea Axstad uppers, Torhamn lowers (painted BM Peale Green)
Ikea Karlby countertops
Whirlpool Sunset Bronze Fridge
Cabinet pulls (in 4″, 5″ and 6″)
Grasscloth wallpaper (for range hood)
A huge thank you to Lowe’s for partnering with me on this project, along with Bedrosians, Shelfology and Loloi! These have been a few of my favorite brands/products to work with over the years and they’ve really helped make this kitchen something special.
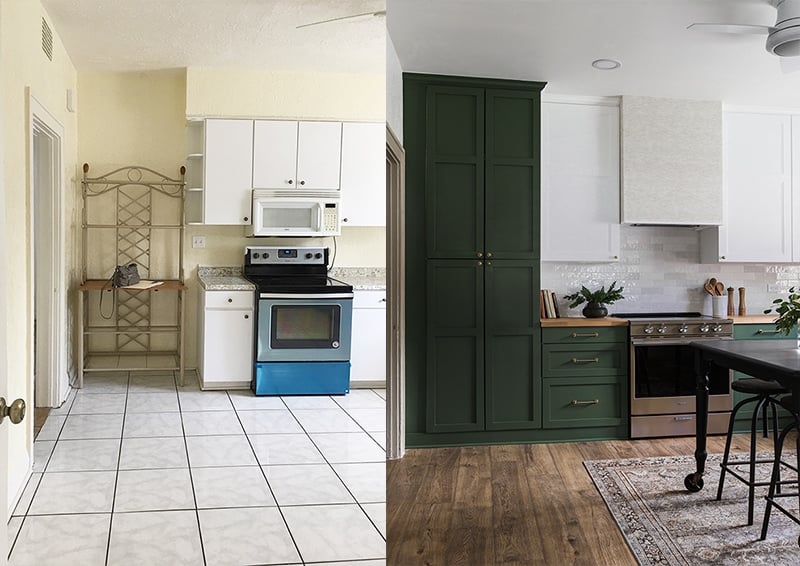
A couple side by side transformation shots, just for fun…
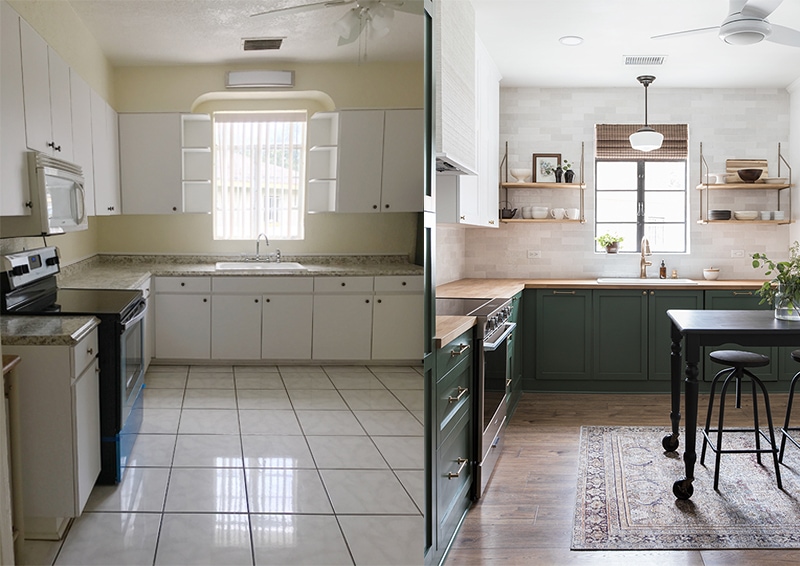
Ahh, so satisfying! Cheers to a clean slate in 2020—more big changes at the Riverside Retreat, coming up next!





Amber says
Hello friend, your kitchen is gorgeous. I went to go buy paint for my cabinets but they asked me if I wanted satin or matte etc. I left confused and empty handed. Do you mind sharing the exact paint you used? Is it specifically designed for cabinets? Is it the advanced interior line? Thank you for your time!
Jenna Sue says
Hi Amber! It is the Benjamin Moore Advance line designed for cabinets, and our finish was satin. I hope this helps!
Meagan says
Amazing! Loved watching this transformation. Could you share what grout color you used for the backsplash? Also looks like you didn’t space between tiles is that correct? Thank you in advance!
Jenna Sue says
Thanks Meagan! We used white (alabaster) grout. No spacers between the tiles.
Amy says
I love all of this! You did a fantastic job! May I ask where you got that cute black pot on your counter? The one with the cedar branches in it?
Jenna Sue says
Thanks Amy! It was actually a thrift store find 🙂
Lydia says
Your remodel is Amazing and inspires me! Would you consider sharing you paint color! We just bought an original home built for the TVA employees that made the dam in Norris TN and I’m thinking about painting my cabinets green. I love your paint color!
Kaleigh Martin says
Beautiful Kitchen and a great resource for anyone planning an ikea kitchen like myself! I keep coming back to it. Can you share what type of wood was used for the Custom wood panels around the fridge? Thank you!
Aimee says
We used Peale Green as well on a recent kitchen Reno. I don’t understand why more people haven’t caught onto this green. It is perfect and we get compliments on it all the time. I just stare at the cabinets all the time bc I’m obsessed with it lol! Your kitchen looks fab!
Cissy B says
Wow, wow, wow! I just stumbled across your blog and am having trouble getting started with my day because I want to read all your posts! Really stunning kitchen, you are an inspiring team. Love the green and the drawer hardware. Really, the whole package is superb. Thank you for providing details and sourcing information. I think your blog is nicely done too – engaging, inspiring, and informative without being too wordy. Just right!
One thing I wonder about is if you have been testing for lead before remodeling these old homes? This woman (https://tamararubin.com/) has tons of information and has become a lead-safe activist after her children were lead poisoned when her home was being worked on. Now her kids have permanent brain damage. Sorry, I have lead on the brain after following her for the past year – I just wanted to mention it to prevent it happening to your family in case it was something you were unaware of.
Happy New Year, I can’t wait to see what’s next!
Claire says
Hi, everything looks amazing – I am green with envy 😉 We’ve just moved to the Scottish Highlands and have to fit a new kitchen. In our London house, I painted Ikea Hyttan cupboard doors for our kitchen and loved them. I recently discovered they are no longer available and was tossing up whether to do the same thing to the Torhamn but wasn’t sure. After seeing how your doors turned out, I will go forth with confidence!
Meredith says
Beautiful! What grout did you use for the white Cloe backsplash?
Liz says
Hi! I love the way your kitchen turned out!! I especially like the look of your windows. Were they pre-existing? If not, could you let me know where it was purchased?
Jenna Sue says
Thanks Liz! They’re the original 1946 windows 🙂
Sherri says
This is so gorgeous! Can you comment on the durability of the rug? I love some of these Loloi printed rugs, but some of the reviews are very mixed. Thanks!
Jenna Sue says
We’ve had the same one in our living room for a few months and absolutely love it. It’s flat and easy to clean, no stains after heavy use and it hides everything.
Abby Harris says
As always, amazing work! You guys are so talented. Curious to see how the IKEA butcher block holds up with the rental. Have you ever used them before? Thinking about doing the same thing in some of our rentals.
Jenna Sue says
Never tried it so this is new territory for us, but we figure worst case scenario if we do have to replace it in the future, we’re only out a couple hundred $! Worth the risk IMO 🙂
Michelle says
Looks so good and I really love that tile! I can’t wait for a whole house tour when this is done! It’s been a while, so a refresher on the rest of it would be so good. Happy New Year!