Way back in July of last year we cleared out our garage, rented a storage shed and embarked on our slowest renovation yet…
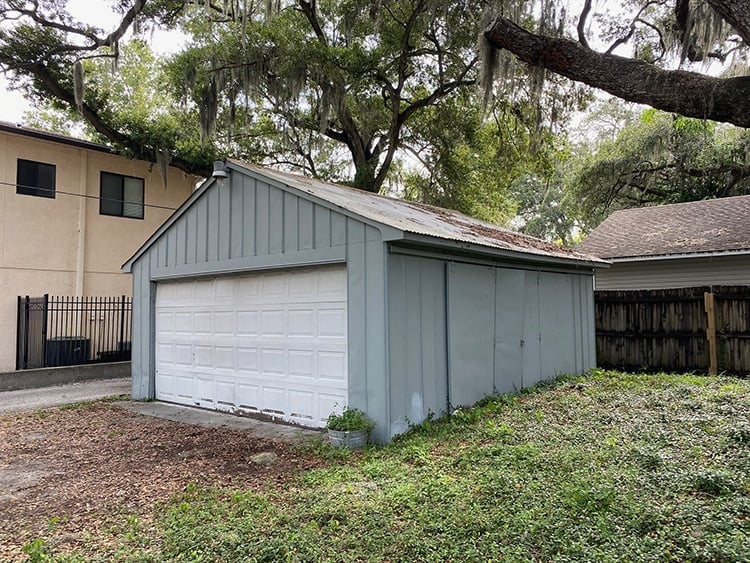
This detached garage is the only original structure that remained after our house caught on fire. We didn’t have the budget to replace it when we rebuilt our home, and it has sat at the bottom of our priority list.
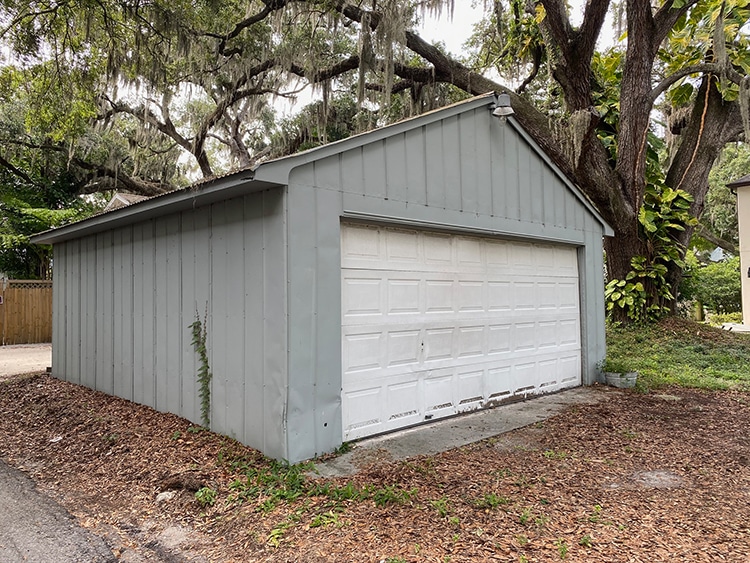
But it was an eyesore, it was falling apart, and impacting our day to day lives as DIYers.
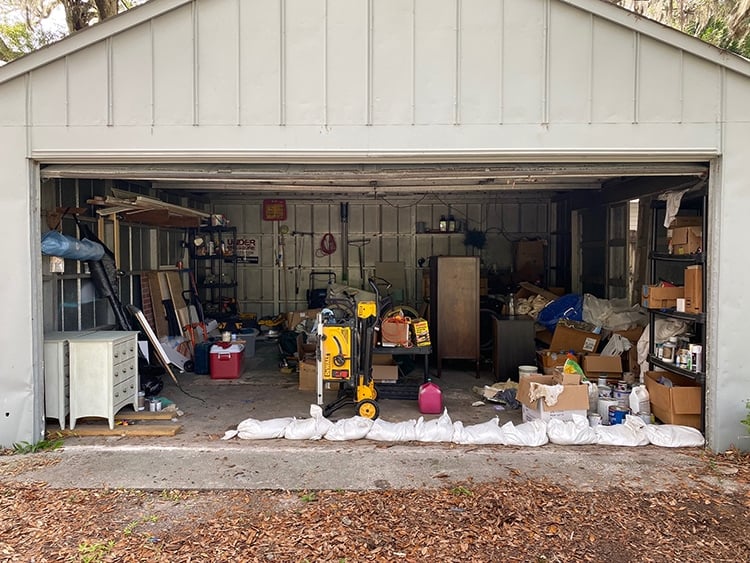
We desperately needed a workshop, or at the very least, somewhere safe and dry to store our tools and projects. There was no electricity, it flooded every time it rained and the garage door was never operational (it’s a miracle our expensive tools were never stolen!)
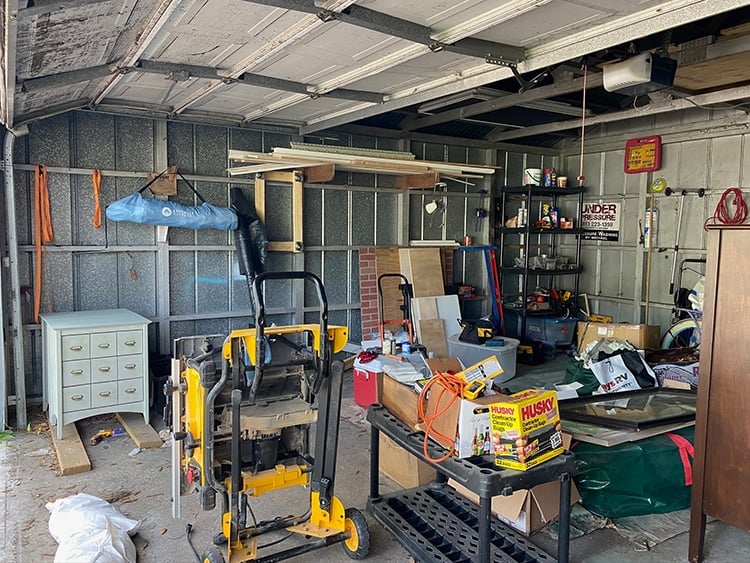
As you can see, it was a disaster and one of our biggest frustrations. Enough was enough! The structure was barely standing and honestly would have been better off demolished and starting from scratch, but we didn’t have the budget to completely start over, so Lucas decided to take it all apart piece by piece and rebuild a little at a time.
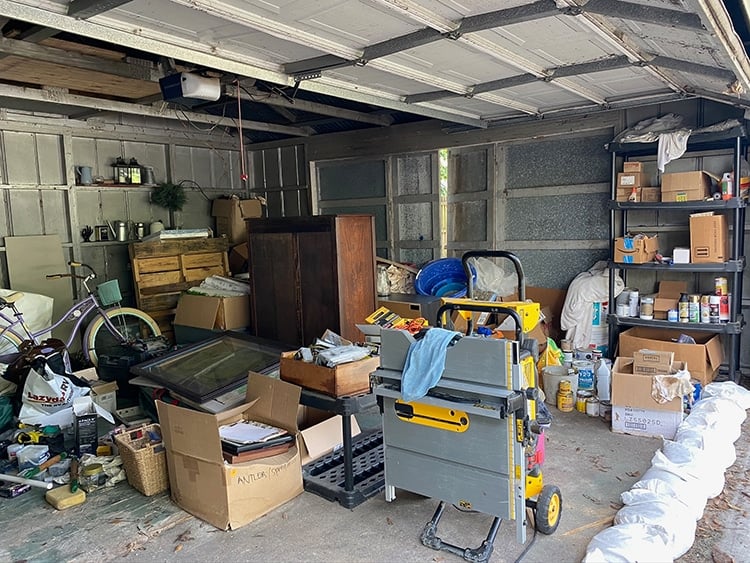
A little being the operative word—here we are eight months later, and we are still months from finishing. To be fair, the garage renovation still takes a back seat to all of our other projects so there have been weeks that have gone by without any progress. Things have sped up more recently, however, and I thought this would be a good time to recap all of the work done so far—including expenses, what we hired out and why, and our plans to finish the space.
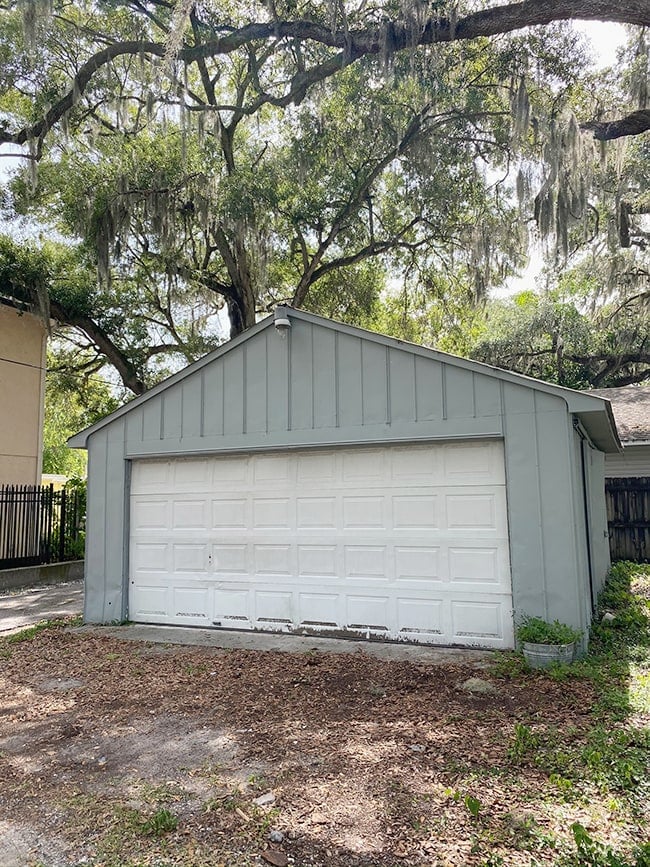
Lucas was eager to take on the challenge and learn new skills—most of this he’s never done before, and he taught himself through video/blog tutorials online. My involvement is pretty minimal (apart from the organization/design, of course!) so I’ve asked him to recap the entire process. This will be a summary of each step, since we can’t squeeze everything from eight months of work into one post 😉
Feel free to leave any specific questions in the comments and we’ll make sure to answer!
Jump to:
Step 1: Build a retaining wall
This step was unique to our situation, as the right side of the garage wall was up against the slope of our yard, buried under a couple feet of dirt/roots…

A wall had to be built to keep this area clear and separated from the rest of the yard, and to keep water away from the structure. I dug out all of the dirt/leaves/roots from the side of garage a few inches deeper than the floor level, and 12” past where the wall would sit.

Using leveling sand as a base, I stacked three rows of retaining blocks along the width of the entire wall (the pavers along the garage were already there, I just uncovered them).

For water drainage, I added gravel in the gap behind the wall with landscape fabric underneath, then ran a perforated pipe at a slight grade towards a drain I installed near the back of the garage.

The drain was wrapped in the landscape cloth and covered back up with dirt. The ground cover has since filled in up to the wall, and we’ll be filling in the space between the wall and garage with more gravel at the end.

Step 2: Remove old siding, rotted wood and frame new walls
This was one of the longest steps of the renovation. All of the dented metal siding had to go first, of course, including the rusty metal roof (we ended up taking over 1000lbs of metal to the scrap yard!)
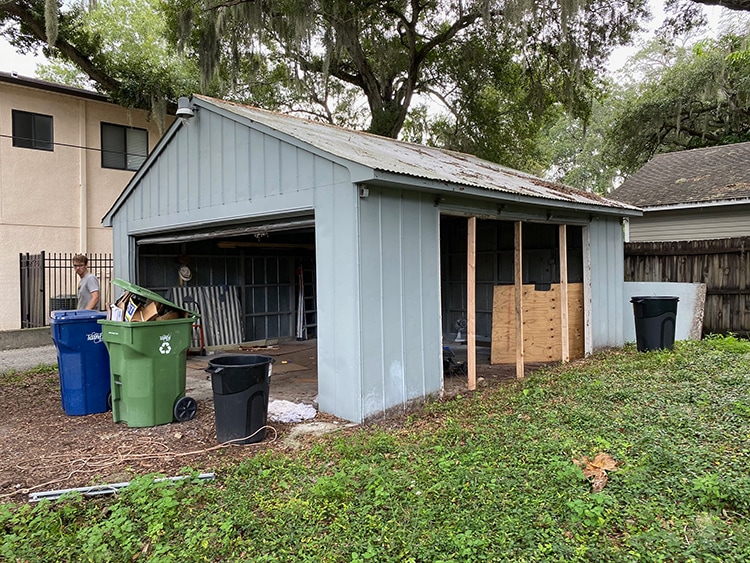
I removed and rebuilt one wall at a time, starting with the worst offender which had a completely rotted header.

No idea how that half of the garage was still standing—it was so bad I didn’t even need a hammer for most of the framing demo and just used my hands.

2×4’s were used to support the trusses as I removed all of the original everything—from the metal siding to the old studs to the top plate.


I originally thought I’d only have to replace one wall as the others looked like they were in good shape, but quickly changed that plan as more and more termite/carpenter ant damage was uncovered.

We paid someone $150 to remove and haul away the old garage door before starting on the last wall. The previous garage door header beam wasn’t built correctly. In fact, it wasn’t long enough and literally wasn’t sitting on any supporting vertical 2x4s on either side of the door opening. Being attached to the header was the only reason it wasn’t falling down!

We built a new header using 2×12’s (at the proper length so it can actually do the job of a header!) and structural screws in an alternating pattern from both sides. With the help of my dad and brother in law, we used a pulley system to hoist it up into place and secure it.

Step 3: Install sheathing
Once the garage had new framing, it was time to start enclosing it. I decided on a Zip system (which is what our builder recommended and used on our house).

This is considered a top of the line product and it has a moisture barrier on one side. It’s a bit more expensive than regular plywood sheathing, but it adds an extra layer of protection that is well worth the cost.

Some Lowe’s sell Zip sheathing, but you are better off finding a local lumber yard dealer for more inventory.

Step 4: Install new roof
After spending time watching lots of YouTube tutorials, I was confident I could take on this project alone. Before the sheathing, I sistered up most of the roof blocking for extra strength and replaced any rotted pieces. I also cut down the trusses to match the size of the overhang we have on our house, and framed out the gable roof overhang.
I ordered our shingles from a local roofing supply to match our house—Tamko Weathered Wood. Zip System sheathing is designed to have most asphalt shingles attached directly to them without the need for roofing felt or underlayment (check with your shingle manufacturer if that’s the case with your specific shingles).

I installed the shingles the old fashioned way, with a hammer and roofing nails. It would have gone a lot faster with a roofing nail gun, but I liked the precision of hand nailing and avoiding the hassle of hauling a nail gun around on the roof attached to a compressor.

Make sure you have a tool belt if you do it this way! This is the one I use.

The roofline was finished off with the standard dark brown drip edge (also the same product used on our house). We decided not to install gutters, but I still need to order the soffit and fascia trim.

Step 5: Run electric
This was a job that made more sense to hire out. I received multiple bids and went with a recommendation from another builder. The garage didn’t have power so we had to run a new line from our house, which required digging a trench through the yard.

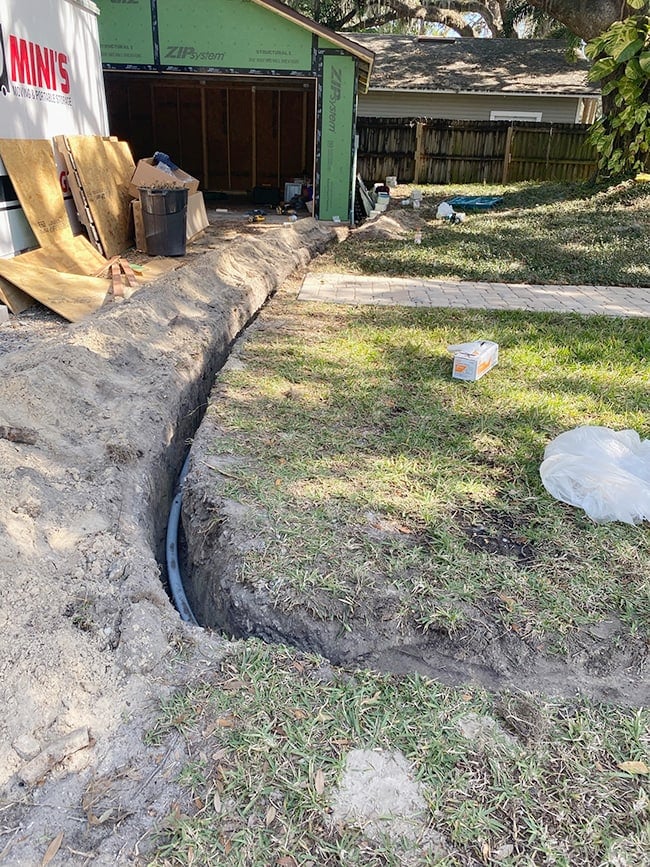
He installed a 100 amp panel to ensure we’d have enough power to run multiple power tools, the lights, and an AC all at once.


This was also the time to figure out where we wanted outlets and light placement. We came up with a rough plan and marked the outlet locations on the wall.

I also added blocking between the trusses where we plan to install recessed lights, plus a hanging light near the center of the room.


The electrician and his crew had the rough-in completed within a few hours.
Step 6: Stucco
This was the most physically challenging step. Stucco is an expensive job to hire out (several thousands) and I knew I was capable of doing it myself, so I didn’t bother getting any bids. Once again, I learned everything by researching and watching videos online.

First step: house wrap. This one had good reviews and the price was right (we later learned there are better options, but we have nothing to worry about since we’re using the Zip system):
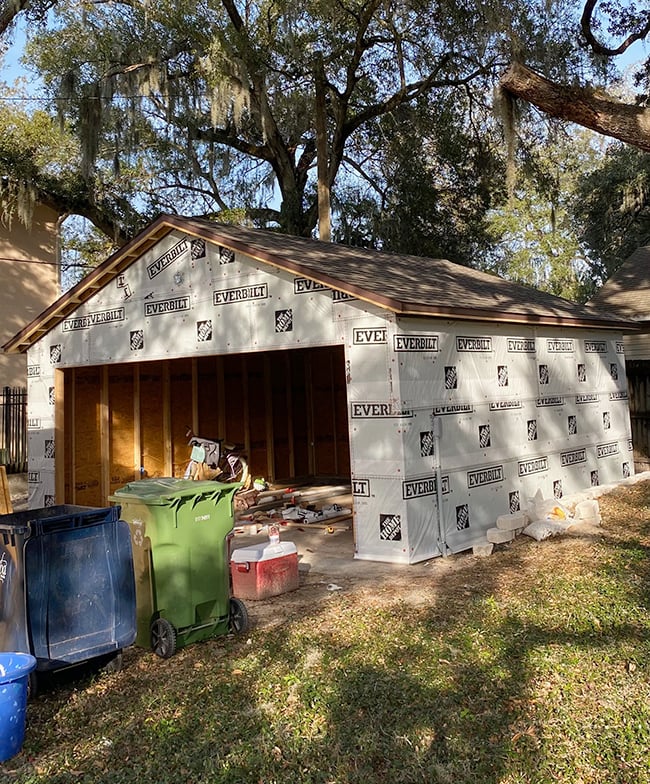
I bought the metal lath and tools from a local building supply place, and the scratch/brown coat stucco mix from Lowe’s. I tried to rent the lathing staple gun from Home Depot, but they didn’t sell the right size staples to go with it! So I once again chose the longer route of using common nails and bending over the heads to pull the lath tight to the sheathing.

While it took longer, it allowed me to have more control and feel for hitting the studs and pulling the lath in the right direction. Plus I didn’t have to lug a compressor attached staple gun up on ladders while trying to wrangle the lath into place! If I had scaffolding a staple gun it would have been much more manageable.
Then came the fun part: applying the stucco.

Using a mixing drill attachment, I mixed a small batch of stucco at a time to ensure I was able to apply it during the working time window for the material. I started in one corner and got 3/4 of the way around the garage before I ran out of daylight (and arm strength).
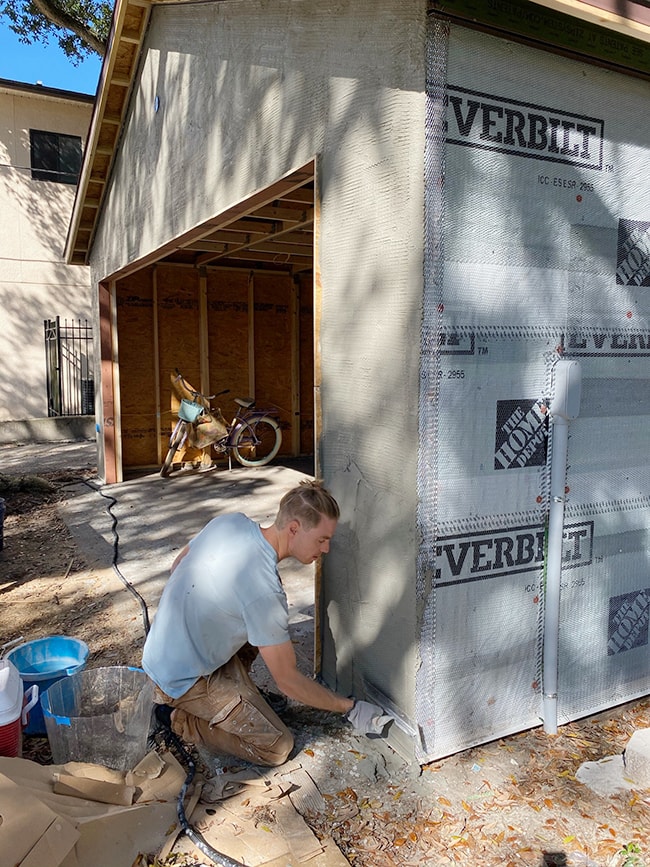
I moist cured the first scratch coat for four (I believe) days before applying the brown coat—this refers to spraying the wall with water in the morning and the evening so it doesn’t get too dry too quickly. It helps prevents cracking and increases the overall strength of the stucco.

The second coat of stucco is called the ‘brown coat’. It’s the same material as the scratch coat, but you use a hard plastic or cork float after applying to compact the material and bring the sand to the surface.
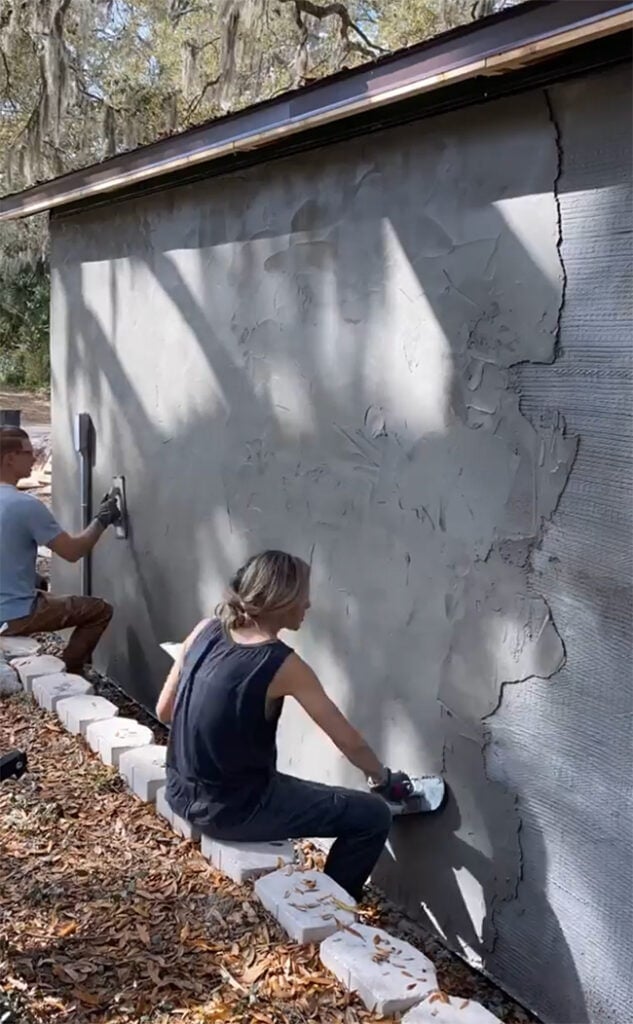
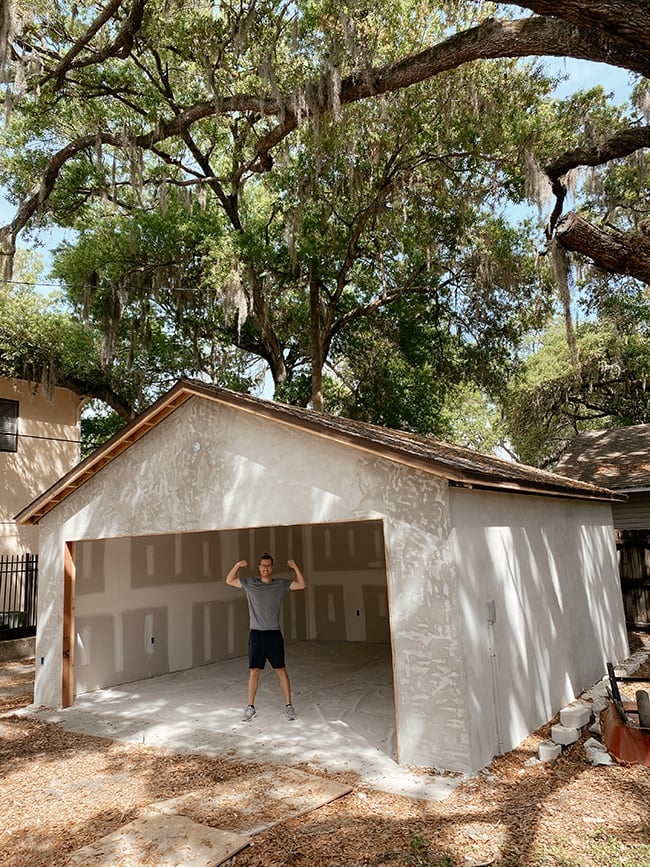
We finished the brown coat a few weeks ago, and now we’re letting it cure for a couple more weeks before applying the finish coat.
Here’s how it looks today:
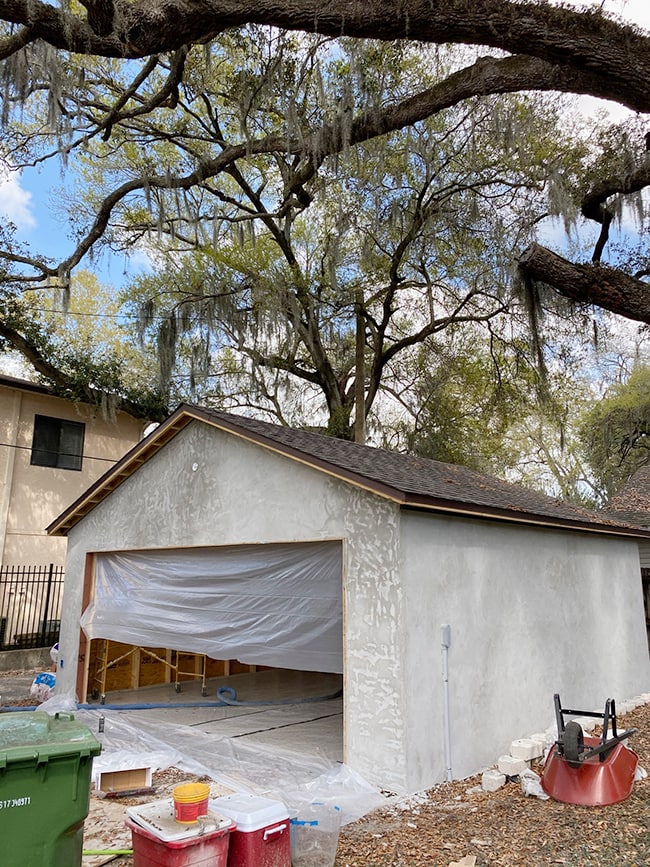
We’ll be texturing it to match our house (at least attempting to) and then painting it the same color as well, Sherwin Williams Oyster White.
Step 7: Epoxy floors
This project was one we were considering tackling ourselves, but our concrete floors were in realllly rough shape. They looked like the surface of the moon. There was one large, deep gouge that we would have likely had to fill with concrete, and wait another 30 days before refinishing/prepping it for epoxy.

Prep work is key and we need these floors to last, so leaving it to the pros made more sense,—especially since they could finish in one day. At this point, it’s worth paying a little extra to get this project done already.
We hired Premiere Epoxy (one of the most popular local companies in our area).
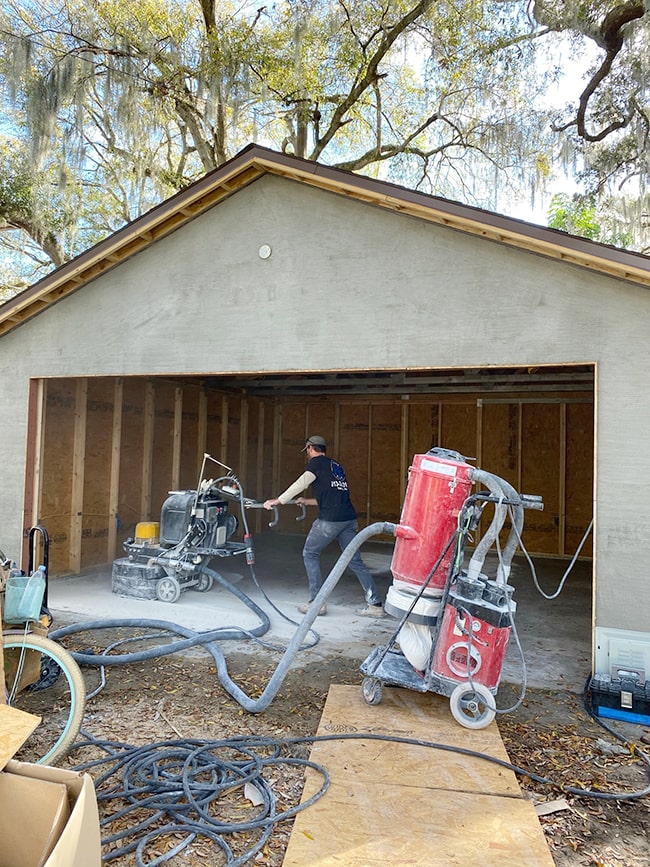
They used a heavy duty grinder to sand the concrete down smooth, and filled all of the patches with some sort of special tar (they had to go over the large gouge a few times).

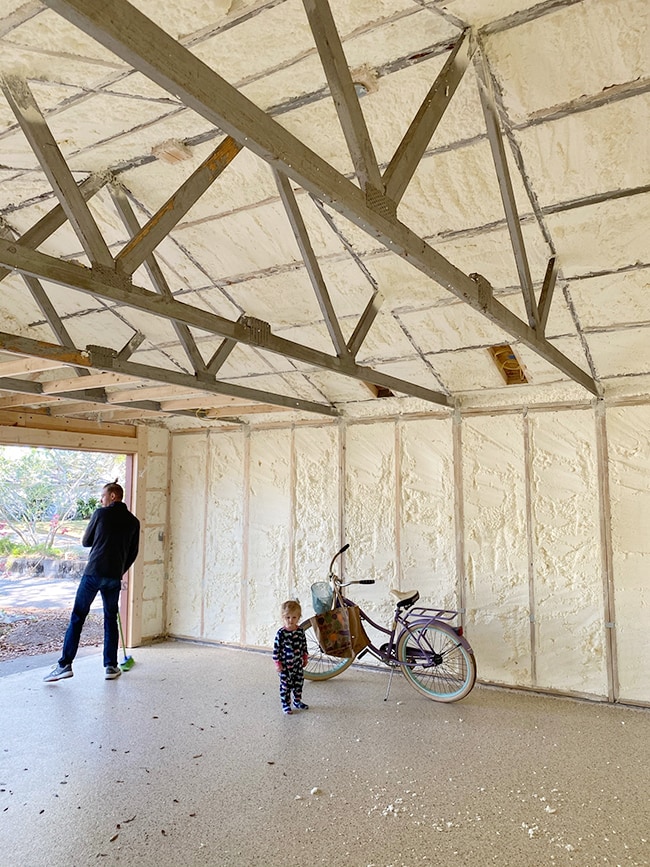
We chose a neutral color chip base (whites, browns, black and beige) mixed with gold fleks—you can’t see them in this photo but they’re such a fun little feature! Esmé loves the sparkles 🙂

Step 8: Insulation
This garage will be primarily used as a workshop, so we needed to provide some protection from the Florida summers (we will be using a portable AC as well). We decided on spray foam insulation for a few reasons:
- We needed it for the ceiling above the drywall
- It eliminates the need for roof vents since the insulation barrier is right up against the roof decking
- It’s mold resistant and a more complete barrier than traditional insulation
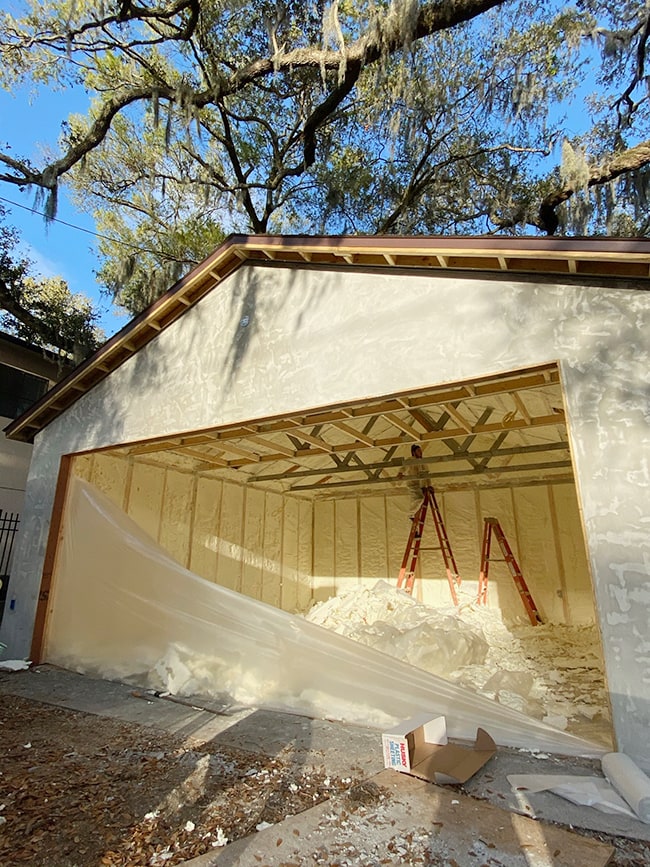
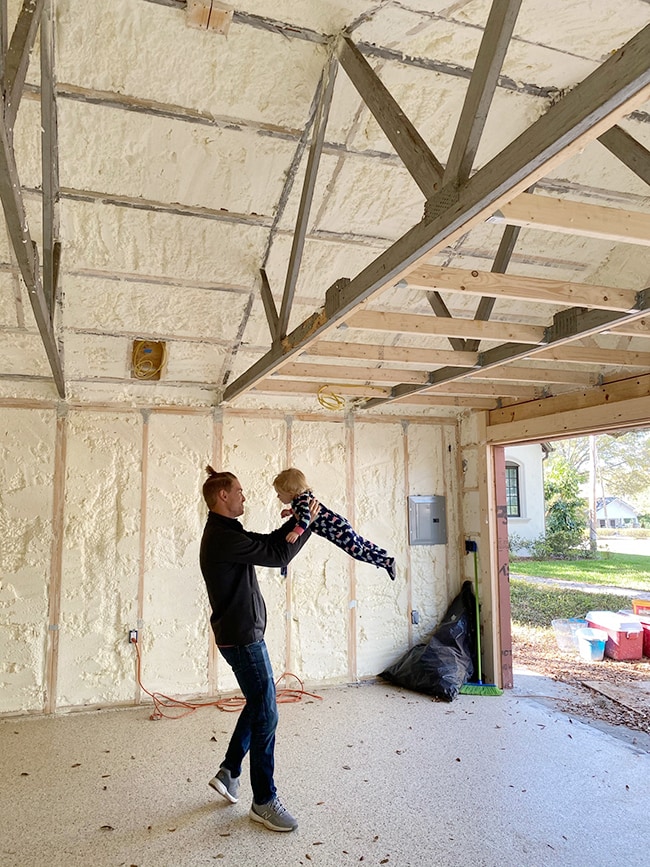
Spray foam insulation is very common here in Florida and is used in most new builds (including our house). My original plan was to DIY this myself using kits available at various stores, but the cost of the kits to do just the ceiling was about the same as hiring a professional company to spray the ENTIRE garage—no brainer to hire out the whole job. They were in and out in one day.
Step 9: Drywall
This was another job I considered DIYing, but it would have been difficult to get the sheets up on the ceiling and around the exposed trusses.

It took a crew several days but it looks great now—this was one I’m definitely glad I hired out to professionals.
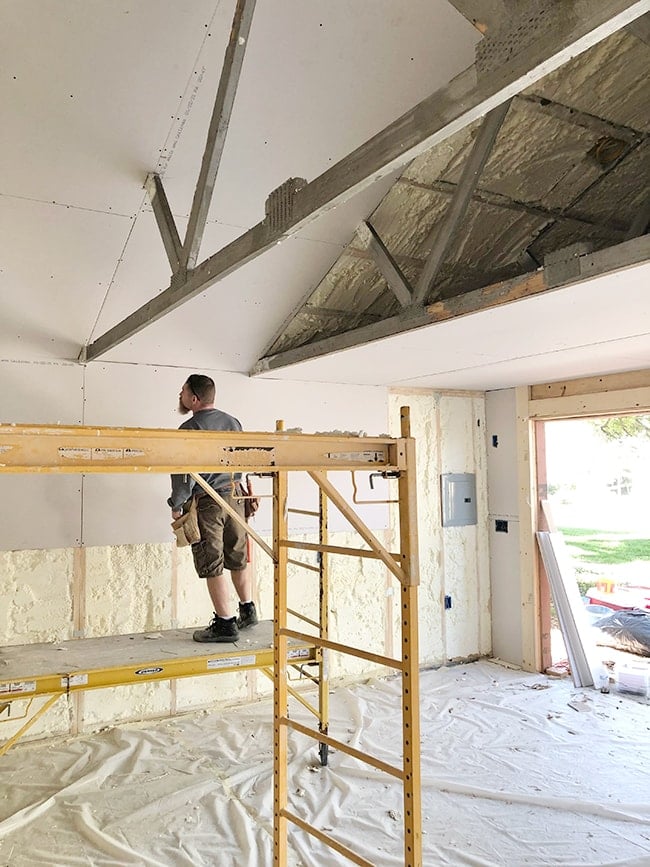
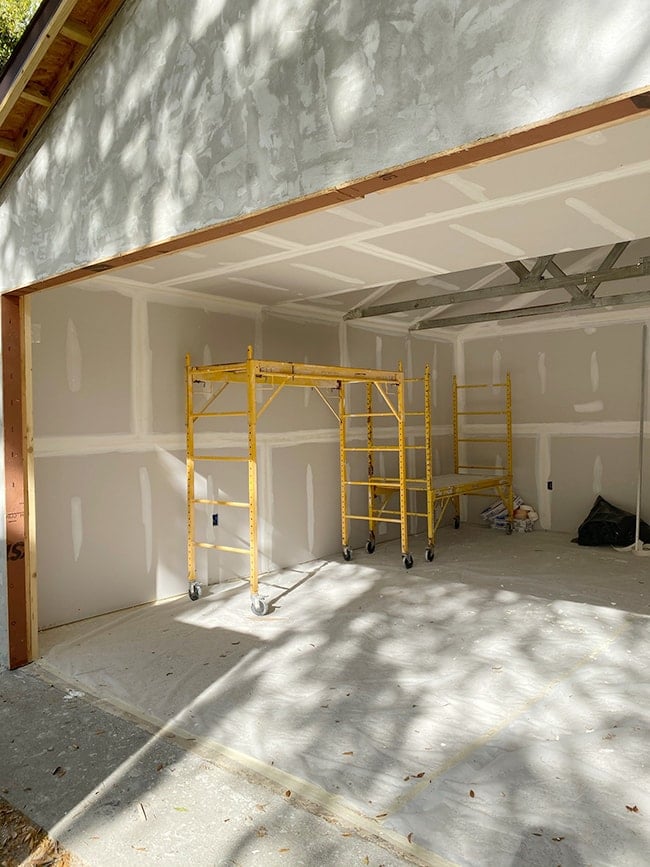
I added blocking between the trusses on the front half of the garage, as that space will be used for hidden storage. We decided to leave the back half of the garage vaulted to feel more open, since it would just be wasted space otherwise (our ceilings are just under 8′ tall).

Eventually we’ll clad over the old trusses with wood and make them a design feature. The drywall is now taped, mudded, sanded and ready for paint!
Step 10: Design & Organization
And that brings us to today! We still need to prime and paint the garage (possibly next week?) add the final coat of stucco, wait a month for that to cure and then paint it, finish the roof fascia, get our garage door installed, install lighting, build storage cabinet and a workshop area, hang shelves and organize everything, build a pergola, pave the driveway and THEN… we’ll be done. At this rate I think we’ll be lucky to finish by fall (but Lucas is more optimistic)…
Let me share the layout plan we came up with after lots of back and forth. Each square represents one foot, for reference (it’s an approx 20×20′ garage).
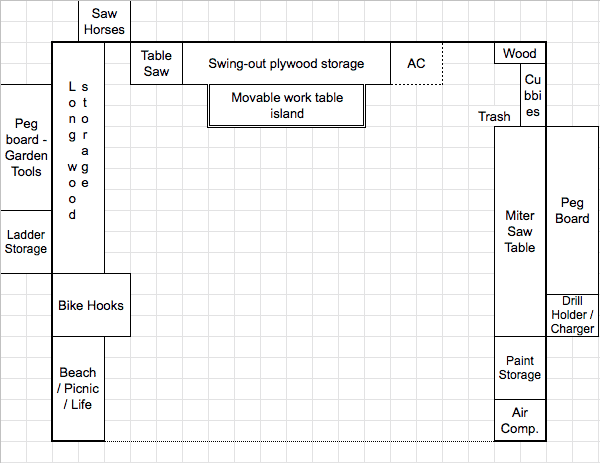
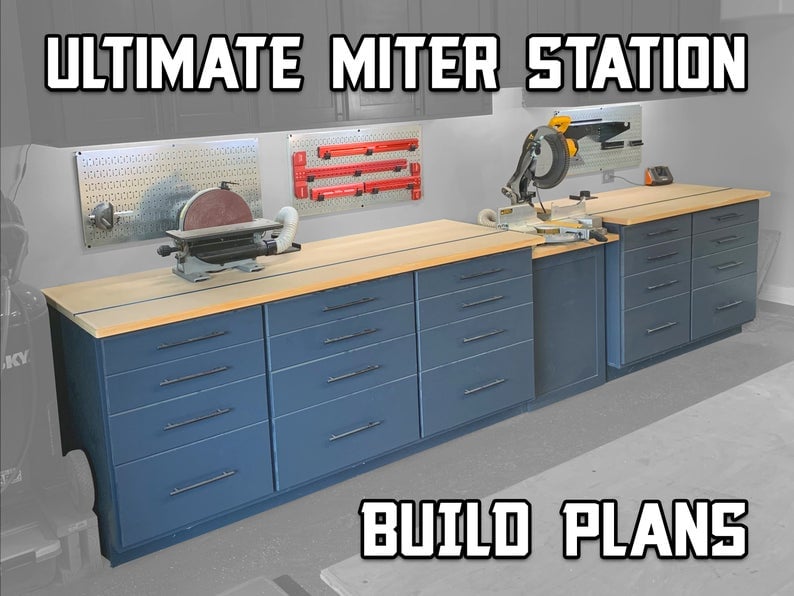
The big project in here is building a custom miter saw table complete with drawer storage, as well as a tall cabinet to hold our paint. Since it’s tough to visualize exactly how much space you need for things, this plan is subject to change.
I’ve been saving my inspiration here on Pinterest, if you’re in need of some garage ideas (there’s a seriousl lack of good content out there!) and it was there that I found and purchased these plans to build a miter saw bench on Etsy (totally worth the $13!)
We don’t plan on parking our car in here (the garage will be filled with too many projects 24/7 anyway) but there will be space to park one car if needed.
For the garage door, we chose a Clopay Gallery Steel 3-layer insulated door with a walnut finish. Here’s a mockup of how it should look:
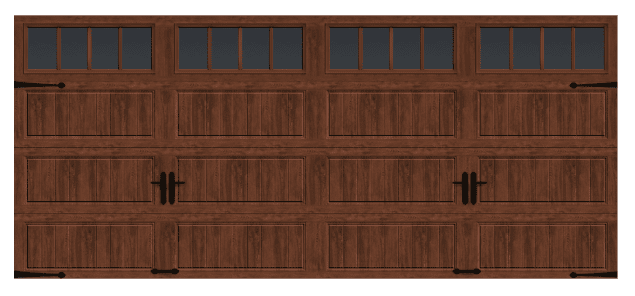
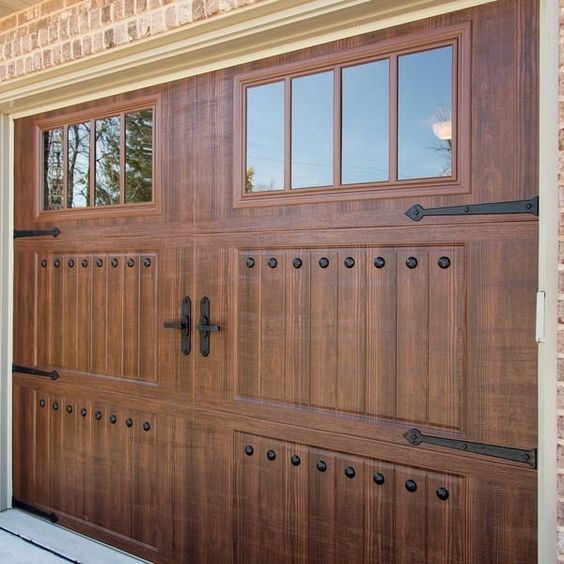
Clopay has a longer than normal lead time right now, so we were told to wait 1-2 months before install (that was a few weeks ago). Here’s an example of a similar door in real life… swoon.
Can you picture a pergola above it with climbing jasmine?
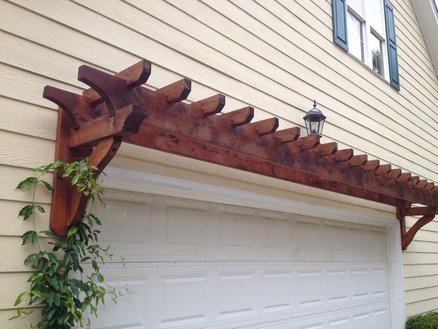
I haven’t decided much on the pergola aside from staining it black. Maybe we’ll DIY, maybe not, who knows. And we’ll (at least attempt to) grow climbing star jasmine. I also bought a nice antique-style lantern to hang above it (and it’s budget-friendly, too).
Expenses (so far)
While we still have a ways to go, we’ve already incurred the majority of our expenses (apart from paving the driveway). Here’s a breakdown of each phase):
| Retaining wall | $406 |
| Wall Framing & wall sheathing | $1,062 |
| Roof framing, sheathing, shingles | $1,598 |
| Electric | $4,100 |
| Epoxy floor | $2,100 |
| Stucco | $1,400 |
| Insulation | $1,225 |
| Drywall | $3,100 |
We also need to factor in the $152/month for our storage shed, which will likely come out to over $2k in the end. My guess is that the entire renovation will cost under $20k, hopefully closer to $18-$19k (not including repaving the driveway). That’s probably 1/3rd the cost of a GC to build it new 🙂
Alright guys, I’m sure I’ve missed a few things so if there’s anything you’re curious about, let me know! I’ll continue documenting everything to share on my Instagram as we make progress, and then again in the final blog reveal (but who knows how long that will take). We actually plan to start hanging a few shelves/pegboard on the wall in a couple weeks, and I’ll be sharing that in my Instagram stories.
Next week: the big closet makeover continues!


Peter says
This looks amazing!
Kathleen says
WONDERFUL !! I’m a zillow house searcher and saw a beautiful home for sale and then noticed its next to you. 🙂 My dream apprentice job could be a reality. LOL now if I could just win the lottery for that house. 🙂
It all looks wonderful. For the insulation would you post the company you used, hoping I didn’t miss it.
Jenna Sue says
Haha, small world! We’re all anxious to see who scoops up that house and the lot next to it.
The company we used for insulation is called IBP of Tampa.
Janice says
Wow ? Lucas and you have it all! Your accomplishments are stunning! I’m sure frustraion too ,but I love the detail you give and share and cost breakdown. This is very affordable. Instead of all super crazy expensive.
Did you have to get a permit for all the electrical, etc?
Dying to see the closet! I have a master I want to tackle ..just wish I had your vision. Slope ceiling 2 doors one window and a closet inside with wire shelving. It’s big but messy .
Jenna Sue says
Thank you Janice! It’s definitely doable spread out over 1+ years 😉 Anything under 500sq ft (I believe) does not require a roofing permit, but things like electrical, garage door, siding and framing typically do 🙂
MC says
What a lot of work! Great job! I can see why its taken so much time – thanks for sharing!
Jenna Sue says
Thanks so much MC!
Kathryn says
Way to go Lucas…Stellar job!! There’s no stopping that man…he’s fearless!! The garage looks amazing and so impressive with everything he’s learned and accomplished.
Jenna Sue says
Thank you so much Kathryn! He appreciates that 🙂
Jane Flynn says
Like everything you do, this is amazing!!! One quick “suggestion”, I would have the trash area closer to the front door of the garage, will save you having to walk all the way to the back each time.
P.S. Your closet is AMAZING!!!!!!!
Jenna Sue says
Thanks Jane! The trash is near the saw where we’ll have scraps to throw away, be might be able to squeeze a small one by the front door too–we’ll re-evaluate when it all comes together!
Teri says
+1 Votes up to all these comment!
Megan says
Any reason you didn’t want to add a door into the garage rather than just the garage door? I figured it would keep more AC inside rather than the garage door going up!
Jenna Sue says
Hi Megan! We considered switching to a single car garage with a door entry instead, but wanted to keep the option of a two car garage for the future. Plus there’s no window in the garage so this will allow more light in 🙂
Nadine says
High five to Lucas – Amazed at all of the new projects he tackled in this garage re-built. Great job!
Jenna Sue says
So proud of this guy!
kiki says
This is amazing! how do you two not have your own TV show yet?? LOL
Jenna Sue says
Thanks Kiki! I think I prefer the blog and Instagram ;P
Monica says
Lucas – what doesn’t he know?! I’m so impressed with your willingness to try, learn & do. It looks great!
Jenna Sue says
He didn’t know much eight months ago, ha! Everything is figure-out-able thanks to the internet 😉
Lexi says
I love that every space is important to you. It’s not common to add decorative features to a garage, but why not? You’ll be spending so much time in there, might as well make it pretty! ?
Jenna Sue says
Thank you Lexi, and I completely agree! Might as well make it a place we want to hang out in!